Spinning yarn and weaving it into fabric is one of the things that brought humans out of the stone age. Nearly every household in the world used to make yarn but now it’s mostly done as a hobby. Whether you want to pick up a new hobby or learn how your ancestors did it, you’re here to learn how to make yarn.
To make yarn you need fiber and something to spin it with. Prepare your materials and start accumulating twist. Then, let the twist into your fiber to create yarn and wind the yarn onto the bobbin. You can ply your yarn or just keep it as a single ply. Finally, you need to finish your yarn by washing it so it is ready to use.
When it comes to making yarn there are a lot of steps, but they all happen quite quickly. It’s a very relaxing and rewarding experience. So, with no further ado, let’s learn how to make yarn.
Table of Contents
Materials and Equipment
Before we get into how to make yarn, you need to make sure you’ve got everything you need to get started.
Depending on how much you want to get into spinning yarn, there are a few different options with some options being cheaper than others.
But, really all you need to make yarn is fiber and something to spin it with.
Let’s get started and look at your options.
Spindle
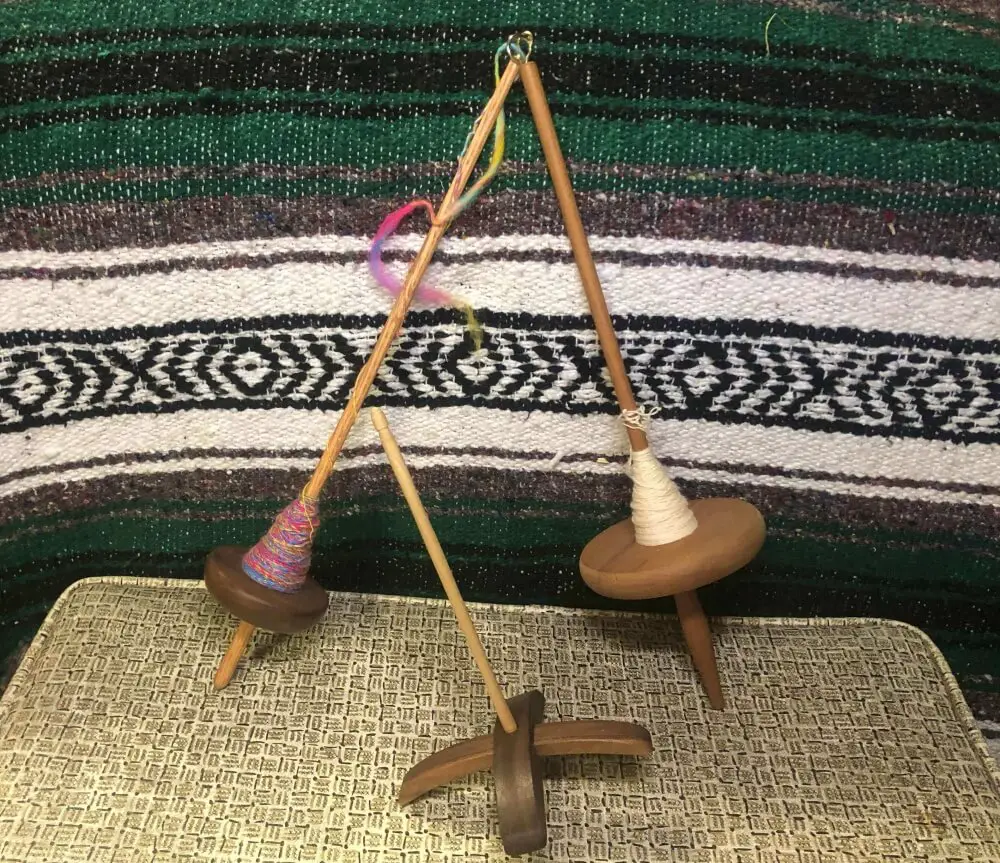
Ah, the spindle. The simplest and cheapest device used to make yarn. Although it’s simple, it’s incredibly effective at what it does.
Spindles come in many shapes and sizes but they all operate basically the same way.
The spindle works by spinning the spindle to create twist which is then added to the fiber. This twist creates the yarn. Once the fiber has been twisted into yarn, it has to be manually wound onto the spindle so you can continue spinning.
The kind of spindle you use depends mostly on personal preference. So, if you’re looking to buy a spindle, I recommend going to a spinning shop and trying some different kinds of spindles out before you make your decision.
Because spindles are small, they are cheaper than a spinning wheel by a lot.
If you just want to give spinning a try and aren’t sure if you want to make it a full-time hobby, a spindle is the place to start.
Another benefit of a spindle is that they’re very portable. I tend to travel a lot and it’s nice to be able to take a spindle with me instead of my big spinning wheel.
There are a lot of tutorials out there for making your own spindle from stuff you have around your house like a pencil and a CD. But, for your first spindle, I would recommend buying a spindle.
A spindle is affected a lot by the weight and balance of the whorl of the spindle. The whorl is the weighted part of a spindle, usually a circle but in some spindles, they can be different shapes.
Because of this, it’s important to get a spindle that has good weight and correct balance, or else your first attempt at spinning could end up being a nightmare.
For more information about what spindles are and how they work, check out this post.
Now, spindles are only one of the instruments you can use to make yarn. Let’s get to the spindle’s bigger cousin, the spinning wheel.
Spinning Wheel
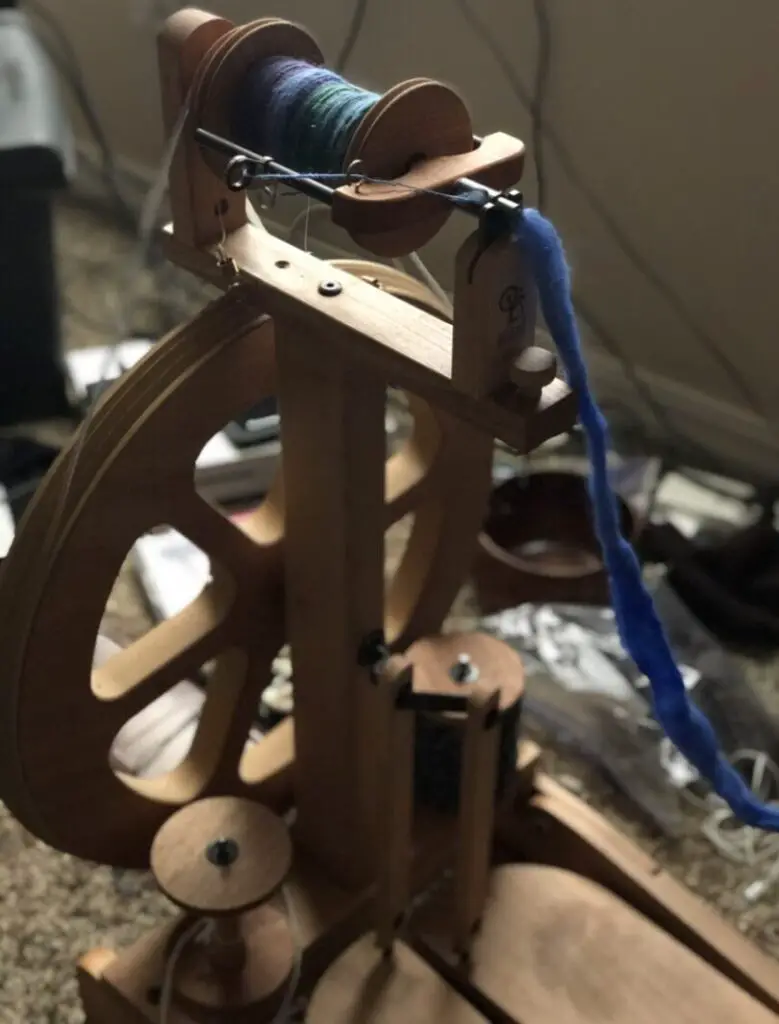
When it comes to how to make yarn, the spinning wheel is one of the best most efficient ways to do it.
Spinning wheels work about the same way as spindles but they’re able to do it faster than a spindle because you don’t have to manually wind the yarn onto the spindle. The wheel winds the finished yarn onto the bobbin for you.
You can also add twist faster because you have a mechanism (the treadles) that spins the wheel for you instead of having to spin the spindle with your own hands.
Last but not least, a wheel can hold more yarn than a spindle can and you can ply yarn much easier than with a spindle.
So, as you can see, a spinning wheel has a lot of benefits over spindles. But, they’re not portable and they are much more expensive than a spindle.
If you’re just looking to get started with spinning, I recommend starting with a spindle and then investing in a good spinning wheel if spinning is something you for sure want to keep doing.
Just like with spindles, there are a ton of wheel types, and the one you choose to use comes down to personal preference.
So, I will once again recommend that you go to a spinning shop and try out a few different types of wheels to see which one feels right to you.
Most shop owners have some show wheels that they’d be happy to let you try and they also have a ton of knowledge about spinning wheels so they’ll be able to give you some advice.
If you’re leaning towards a spinning wheel but what to know more about how to use them, check out my post all about how to use a spinning wheel.
Now that you’ve decided if you’re going to use a spindle or a spinning wheel, it’s time to pick out your fiber.
Fiber
You’re reading this article to find out how to make yarn, but you probably already know you can’t make yarn if you don’t have anything to make it out of. That’s where fiber comes in.
Fiber comes in so, so, so many forms. But, in general, you need to know two things, the kinds of fibers there are and the different preparations those fibers come in.
First, fiber can either be animal-based (protein fiber), plant-based (cellulose fiber), or man-made (synthetic fiber).
There are a million different fibers and fiber combinations out there. But, if you’re new to spinning, starting with wool is your best option.
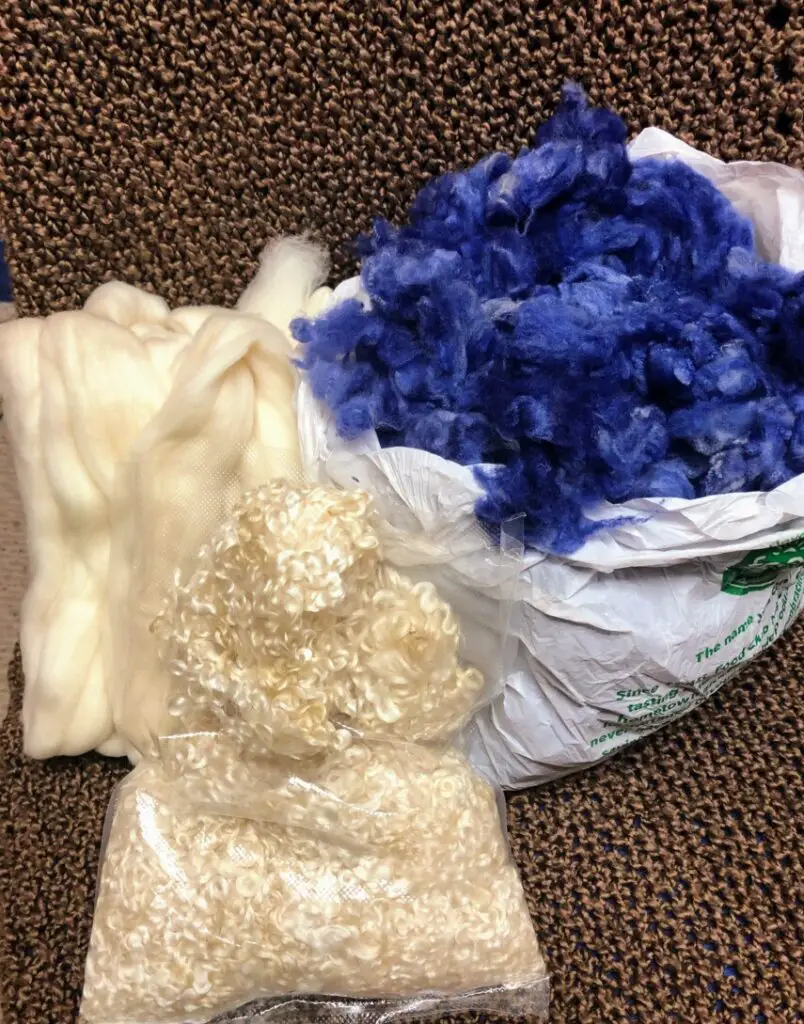
Second, fiber usually comes in either roving, batts, or top. Without getting too technical, the way the fiber is prepared affects what kind of yarn it will make and how easy it is to spin.
Roving and batts make fluffier yarn and are usually easier to spin, top makes sleeker smoother yarn but tends to be slippery and harder to control.
What does all this information mean to you?
Well, if you’re starting out, you want to get some wool roving. More specifically, look for roving made out of Rambouillet, Blue Faced Leicester (BFL), or Romney wool. These are all breeds of sheep and produce grippy wool which is easier to spin.
If you’re interested in making spinning a permanent hobby for you, check out my 5 tips for the beginning spinner.
How to Make Yarn
Now that you know what you need to get started, we can finally get down to the nitty-gritty parts of this post.
That’s right, it’s time to learn how to make yarn.
1. Set-Up Wheel or Spindle
Just like you do before you cook something, you have to get everything set up and ready before you begin, and for spinning, that setup starts with your spinning device.
How you set up your preferred spinning device will depend on what you have. Spinning wheels vary greatly by brand and style so the best thing I can tell you is to look up your spinning wheel online to find how that specific wheel is supposed to be set up.
Most manufacturers will have instructions on their website on how to set up their wheels. If you’re having some trouble finding resources, here are links to the main spinning wheel manufacturers: Ashford, Kromski, Louet, Majacraft, Schact.
Spinning wheels can be kind of complicated but once you have it set up you’re good to go. Spindles, on the other hand, are much less complicated.
Spindles can vary by style as well but the only way they vary is where you will attach your leader.
For a top whorl and Turkish spindle, you’ll start your leader below the whorl. On a bottom whorl spindle and most supported spindles, you’ll start your leader above the whorl.
Now that you have your spinning device of choice all set up and ready to go, let’s get the fiber ready.
2. Prepare Fiber
Unless you have some raw wool you need to prep, preparing fiber is just about making it easy for you to spin. Of course, before you do any of that, you have to decide which fiber to use.
In the fiber section above, I gave some tips about picking a fiber that is best for the beginner spinner. If you need a recap jump back to that section.
If you’re experienced with different kinds of fiber or you’re just feeling spontaneous, just grab whatever fiber you have that feels right to you.
Now that you’ve got your fiber, you might want to consider either pre-drafting your fiber or breaking it into manageable sections.
Most prepared fiber comes in a really, really, really, long strip which can be pretty difficult to manage. Breaking it into smaller sections is a great way to make it easier to handle.
If I choose to break apart my roving or top, I shoot for breaking my fiber into about one-and-a-half to two-foot chunks of fiber. You can also pull the fiber lengthwise into skinnier strips which makes it much easier to manage.
If the fiber is kind of clumped together or not very easy to draft, then I predraft my fiber.
What this means is you pull your fiber apart just a little bit. Not enough to fully draft the fiber out but enough to loosen up the fiber and make it easier to spin. Here’s a video about pre-drafting fiber.
However you chose to prepare your fiber, now you’ve got it and you’re ready to roll. Now you’ve got your spinning device ready and you’ve got your fiber, you are officially ready to start spinning.
3. Start Leader
To get your fiber spinning, you have to first get your leader set up. A leader is just an extra piece of yarn or string that extends out from the bobbin that is used to get your fiber started.
If you need to know how to set up a leader, here’s how you do it on a spinning wheel, and here’s how you do it on a spindle.
Those posts also show how to attach fiber to your leader which just so happens to be what you need to do next.
Now that you’ve got your leader set up, it’s finally time to do the twist.
4. Accumulate Twist
Making yarn is all about twisting fibers together. So, to start you need to build up some twist in your fiber.
Before you begin twisting, make sure you pinch your fingers on your fiber before your fiber supply. That way, the twist won’t get into your fiber supply and make it a twisted tangled mess.
Build up twist in your fiber by spinning your spindle of stepping on the treadles of your spinning wheel. If you’re new to spinning, once you have twist built up, stop spinning your spindle and treadling your wheel so you can begin drafting fiber.
Once you get more experienced, you’ll be able to add twist and draft fiber at the same time. I know, crazy talk.
5. Draft Fiber
With your fingers still pinching your fiber to keep the twist out, you’re going to pull a small amount of fiber forward out of your fiber supply.
You don’t want to draft your fiber out too thinly or else it could break away from the rest of your fiber. And, you don’t want to draft it out too thick or you’ll have a big slub in your fiber.
The trick to drafting is finding the goldilocks zone and getting it juuuuust right.
When I draft fiber out I try to watch where my fiber connects to itself and just before it starts to separate I let the twist in. This is hard to explain in words so here’s a picture of what the goldilocks zone looks like for me.

Drafting fiber depends on lot on the thickness of yarn you’re trying to make. If you want thicker yarn, you don’t draft as far, if you want thinner yarn, you draft out farther.
Don’t worry if you don’t get it right away, drafting fiber takes practice and time. Your first yarn WILL look like a lumpy abomination but that’s okay! Mine looked like that and after some practice it started to actually look like yarn.
Anyways, let’s get back to the next step of how to make yarn.
6. Let Twist In
Now that you have your fiber drafted out, it’s ready to take in the twist.
To let the twist in, take the fingers that have been pinching to hold back the twist and pull them back into your drafted fiber.
This will let draft travel down into the fiber creating yarn. And boom! Just like that you made some yarn.
7. Draft More Fiber
Now you just repeat the drafting and letting twist in until you don’t have enough twist to add to your fiber anymore.
I usually draft fiber until I run out of space to draft back any further. This is an easy way to know it’s time to move on to the next step.
But, another way to tell if you’re running out of twist is if the yarn you just made starts to look limp and the twist is no longer tight.
8. Wind On Single
You have your first strand of handspun yarn, take a second to appreciate the fact that you just made that all by yourself.
But I know you’re wondering, okay I have this strand, now what?
Now you wind your strand of yarn, called a single which is short for single ply, onto either the bobbin of your spinning wheel or the shaft of your spindle.
If you’re using a spinning wheel, your single will get wound onto the bobbin automatically when you start treadling again. Super simple.
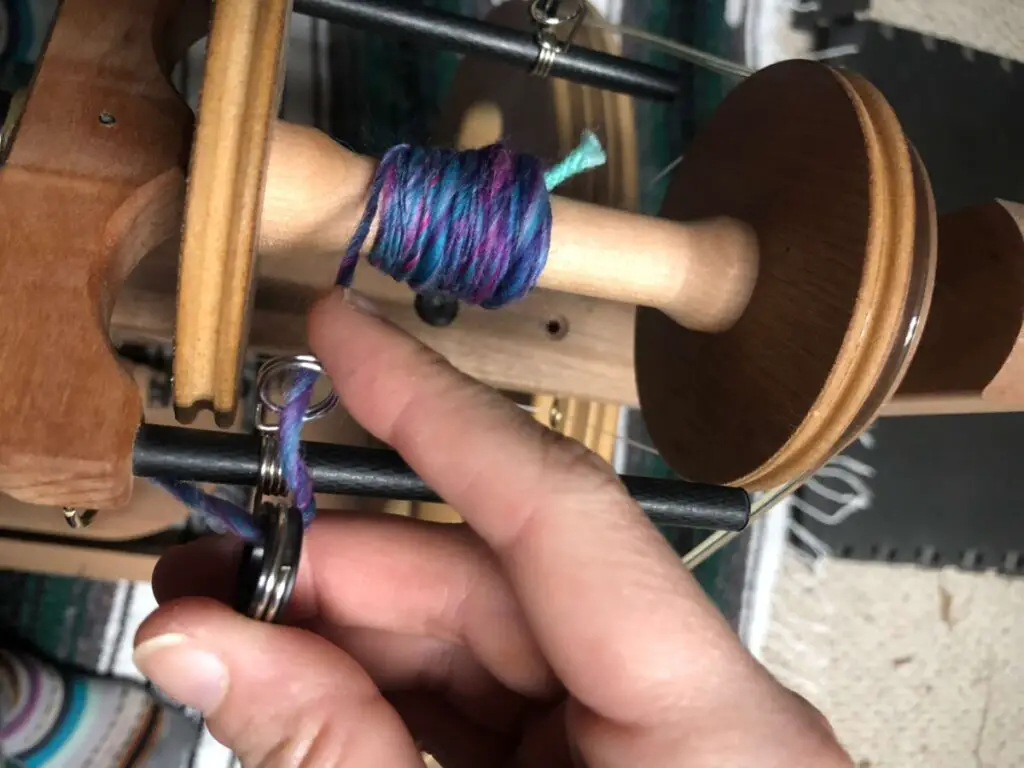
If you’re using a spindle, you’ll wrap your single around the shaft of your spindle. You’ll want to start wrapping close to the whorl of your spindle and build it up from there.
You can wreck the balance of a spindle if you just wrap on the single all willy-nilly, so make sure you take the time to do it nice and neat. Here’s more of a tutorial on how to wind onto a spindle.
To keep making yarn, keep repeating steps 4-8 until you either run out of fiber or you have the amount of single that you want. Then, you move on to step 9.
9. Ply Singles
Unlike the other steps, step nine is actually not required in order to make yarn. What you have right now is already yarn. If you don’t want to ply your yarn, skip ahead to the next section.
If you don’t ply your yarn, it’s what’s called singles yarn because it only has one ply. Ply is just another word to represent how many strands of yarn are twisted together to create the finished yarn.
A yarn label that says it’s a four-ply yarn is just telling you that there are four strands of yarn all twisted together.
The main reason yarn gets plied is for strength. The more plies there are the stronger the yarn will be.
Plying yarn can also affect how the yarn acts once it’s used in creating a fabric and plies can be used to create unique textures in yarn. But that’s a discussion for another time.
Most common for handspinners is making a 2-ply yarn which is what I’ll show you here. There are two main ways you can ply yarn, spinning from two different bobbins, or spinning from a center pull ball.
Before we jump into both of those, there is one very important thing you need to know.
When you start plying your yarn, you have to spin the strands together the opposite way that you spun your single plies.
This means that if your spinning wheel was spinning to the right before, now you spin it to the left. And if you were spinning your spindle to right for your singles, for your plying you will spin it to the left.
If you don’t do this your yarn will not come together, it’ll just be a floppy mess, ask me how I know. I won’t get too technical here but basically spinning it in the opposite direction that you spun it before makes it so the singles twist themselves together.
Now that the important PSA is out of the way, let’s get into plying.
Two Bobbins
Plying with two bobbins is pretty dang easy, but it requires some preplanning on the spinners part. This type of plying is more suited for a spinning wheel, but you can do it with a spindle if you have empty bobbins to use.
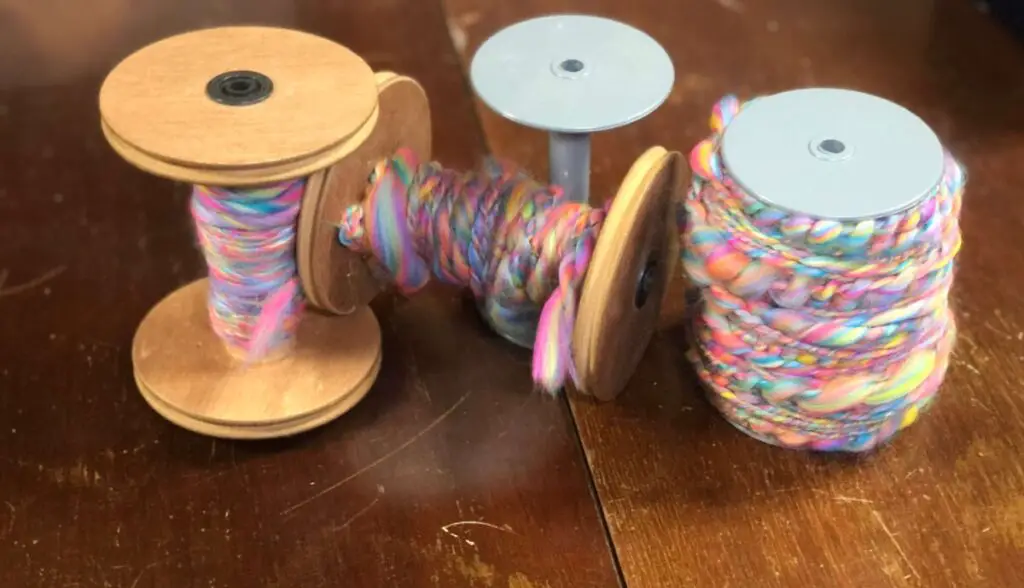
To ply from two bobbins, you first have to have your singles on two separate bobbins.
For a spinning wheel, you’ll just spin onto two bobbins and then put a third empty bobbin on your wheel.
For a spindle, you’ll have to wind your finished singles onto two empty bobbins. You would have to empty your spindle in order to ply with it anyways.
Once you have your two bobbins and an empty bobbin on your spinning wheel or an empty spindle, take the two ends of your singles and hold them together through the leader.
Then, add twist just like you would when you were spinning the singles but make sure you spin the wheel or the spindle the opposite way you were spinning before.
Switch directions will take some getting used to and don’t be surprised if you start going the other way again on accident. Just keep practicing!
Then you would just follow the same steps you used before but instead of drafting unspun fiber, you’re pulling the singles off the bobbin and spinning them together.
Now just keep spinning until one or both of your singles runs out, I’ve never had both of my singles end at the same time but I’ve come close.
After you’re done, you just have to take the finished plied yarn and wind it into a skein.
Center Pull Ball
The other way to make a two ply yarn is to wind your singles into a center pull ball of yarn and then spin together the two ends.
This is a great method to use for a spindle or if you don’t have three bobbins to use on your wheel.
First, you have to wind your yarn into a center pull ball. If you have a ball winder then you can just use that and wind it right from the bobbin or the spindle. But, if not, you can wind one by hand. It’s fairly simple, but here’s a video to walk you through it.
Once you’ve got your center pull ball, you’ll grab the end from the center and the end from the outside. You’ll hold these two strands together and spin them together.
When you start spinning, remember to spin your wheel or spindle in the opposite direction you used to spin your singles.
Then just spin until the ends meet. And voila! You have successfully made a 2-ply yarn. But, you’re not quite done yet.
10. Wind into Skein
You’ve completed making yarn, take a second to celebrate before you do the finishing touches.
Before you use your yarn, sell it, or give it away, you should do these last couple steps. Most importantly, you should wash your yarn, but before you do that you need to get it off the bobbin or the spindle.
The best way to wash or store handspun yarn is to wind it into a skein. A skein is just a specific way to wrap yarn that keeps it looser and better for storage.
Typically, a device called a niddy noddy is used to wind skeins. It’s a crazy name, but don’t let that scare you, using a niddy noddy is simple. Here’s a video on how to use one.
If you don’t have a niddy noddy, you can buy one or you could make one with some simple supplies. The benefit of a niddy noddy is that it also measures the yarn for you as you go.
Most niddy noddies are made so that each pass is two yards which means if you count each strand of yarn in the skein and multiply it by two it tells you how many yards of yarn you have.
However, if you don’t have a niddy noddy and don’t want to make one right now, then you can also make a skein by using the back of a chair or a buddies arms.
It will be difficult to measure a skein of yarn wound in this way, but it’s a cheap and easy way to get the yarn off your bobbin and ready to wash.
If you’re using the back of a chair, tie the free end of your yarn onto the chair, and then wind it around the back of the chair so that you’re creating a loop around the back of the chair. Repeat this process until you’re out of yarn.
Then, add a couple of ties around your yarn. These are just scrap pieces of yarn tied through the skein in a figure eight so it doesn’t get tangled.
If that makes no sense, here’s a video showing how to do the thing.
Now you’re ready for the final step.
11. Finish Yarn
The last step of creating any yarn is to give it a bath. What I really mean is you need to wash your finished yarn.
Washing your handspun yarn helps all the fibers relax and soften which makes the yarn softer and secures the twist that you just put into the fiber.
You don’t need anything special to wash your yarn, just some dish soap will do. But if you’re feeling fancy, you could use some wool wash which is just soap specially made for wool.
The most important thing to remember is to not agitate the yarn while you wash it. You just press it into the water and let it soak.
For some more details on how to wash yarn, check this out.
Then hang your yarn up to dry. I have done two different things when drying yarn. I will either lay it flat on a towel and then flip it over the next day or I will drape it across a drying rack or a hanger.
And now we wait. But while you wait, make sure you do something to celebrate this awesome accomplishment!! Seriously, you just made yarn out of fluff and it deserves to be celebrated no matter how ugly your yarn is.
Wrap-Up
You deserve a round of applause. You went from setting up a spinning wheel or spindle to washing a finished skein of yarn.
Let’s do a quick recap about all the things you did to make your yarn.
First, you set up your spinning device of choice and got your fiber all ready to go. Then you attached your leader and started adding some twist.
After you got twist into your fiber, you drafted back and started making yarn. Once you had a strand of completed yarn, you wound that single onto your bobbin or spindle and kept on spinning.
Finally, you came to a decision point, were you going to leave your yarn a single or ply it together to make it stronger?
If you chose to leave it as a single, then you probably skipped ahead and tied it into a skein and then washed your yarn.
If you chose to ply, then you either used two bobbins or made a center-pull ball to ply from. And boom, you made some two-ply yarn, tied it into a skein, and then gave it a bath.
After you washed your yarn, you just had to hang it up to dry. Then, you had your very own handspun yarn made with your own hands. How cool is that?
We covered a lot and there’s always more practice to be done, so, now that you’ve got one skein under your belt, get out there and make something awesome!