Lemme guess, you’re a craftaholic and you want a new hobby and you’ve landed on making your own yarn. Well, you’re in the right place. Learning how to use a spindle is a great way to get started so let’s jump right in.
To use a spindle, start a leader on your spindle and begin spinning it to accumulate twist. Then, attach your fiber and begin drafting it out to dissipate the twist you accumulated. Once your twist is evened out or your finished yarn is too long to continue, wind the finished yarn onto the spindle. Repeat the process to continue creating yarn.
That is seriously all there is to it. Get twist, make yarn. I should put that on a t-shirt. I know this brief overview doesn’t quite cut it, so keep reading to get a full-blown tutorial on how to use a spindle. Let’s get spinning!
Table of Contents
Getting Started
As with any hobby, you need to make sure you’ve got all the materials you need before you get started. Otherwise, it’ll be a rather short-lived journey.
If you’re an overachiever and you already have a spindle and fiber, you can skip ahead to learn how to use a spindle.
And for all of us normal people, let’s talk spindles.
Spindle
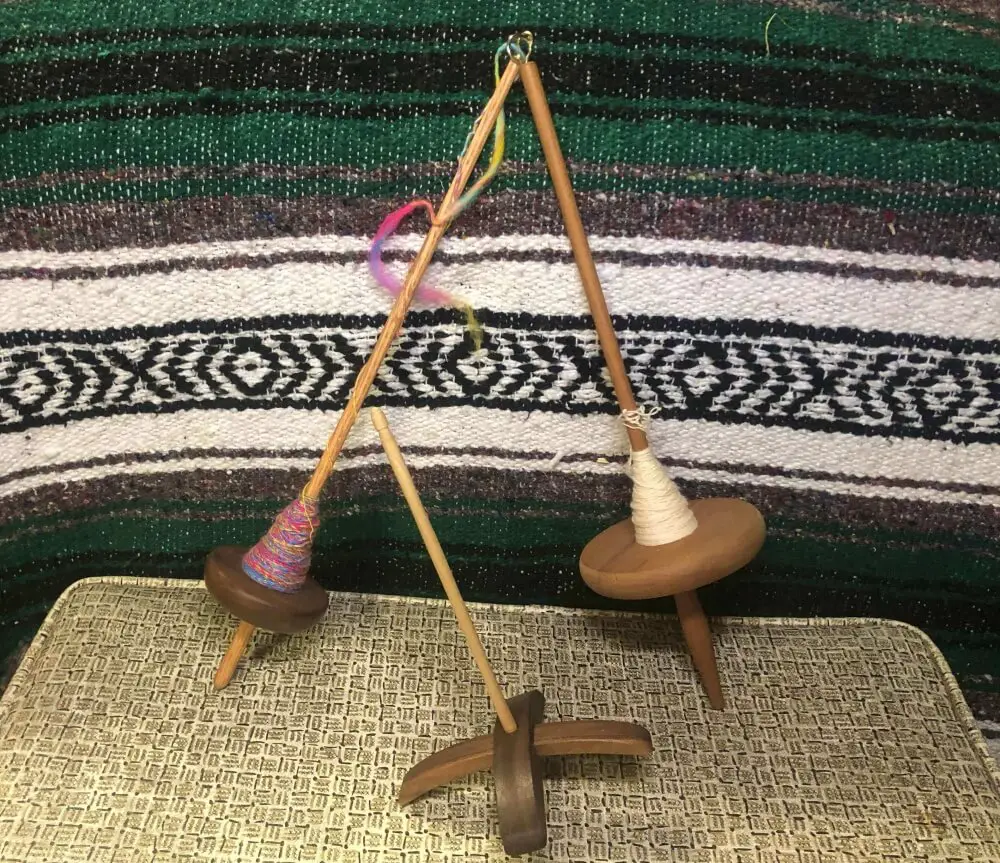
There are two main types of spindles; the drop spindle and the supported spindle. All of the spindles I have (right now, anyways) are drop spindles.
A drop spindle is a spindle that hangs in the air while you’re spinning and the bottom isn’t supported by anything. Starting out with a drop spindle you’ll probably use the park and draft method to make it easier, but more about that later.
A supported spindle is a spindle where the bottom point rests on a small dish. This helps keep the spindle stable while you spin. If you have a supported spindle that you want to use, here’s a great resource with some supported spindle tips.
Within the umbrella of drop spindles and supported spindles, there are variations in the spindles but they all function in generally the same way.
Which spindle you use depends widely on personal preference. If you’re starting out, I recommend going to a spinning shop and trying out the different kinds of spindles to see what you like.
An important thing to consider when choosing a spindle is the weight of the whorl. The whorl is the name for the wider portion of the spindle that gives it its weight and balance.
The weight of the spindle affects the type of yarn you will be able to spin. The general rule of thumb is that heavier spindles make thicker yarn and lighter spindles make thinner yarn. A middle-range weighted spindle is what I recommend for beginners.
There are a lot of tempting tutorials out there about how to make a spindle from things around your house. But, these homemade spindles are usually not weighted or balanced correctly.
A spindle that isn’t balanced will wobble out of control while you’re trying to spin. This can make your first experience with spinning a disaster and make you not want to continue.
If you want to try to make yourself a spindle later once you’ve got spinning down, go for it! But, at least at the beginning when you’re learning how to use a spindle, let’s leave the spindle-making to the professionals.
I first learned how to spin yarn on a spindle and then I decided I liked it enough that I got a spinning wheel and I’ve never looked back. But, I still enjoy spinning on a spindle and it’s a great place to start learning.
You have one part of what you need to start spinning, let’s move on to part two.
Fiber
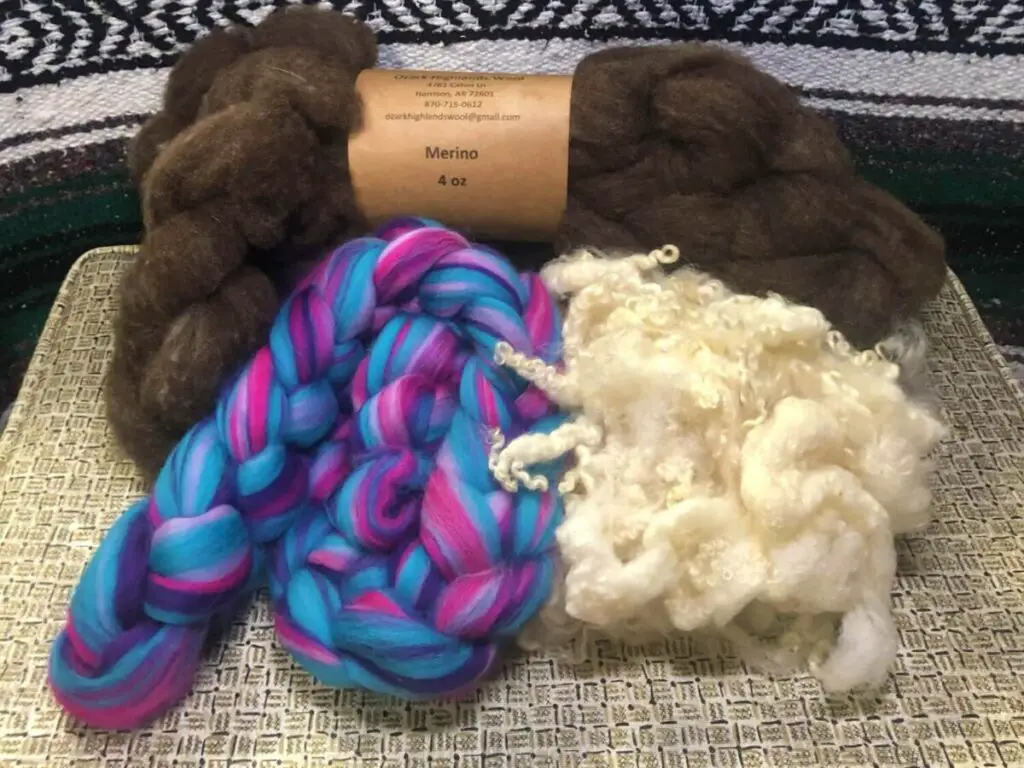
Fiber is the second thing you need in order to start spinning with a spindle.
Fiber can either be animal-based (protein fiber), plant-based (cellulose fiber), or man-made (synthetic fiber). The most common animal-based fiber is wool, the most common plant-based fiber is cotton, and the most common man-made fiber is acrylic.
Regardless of what kind of fiber you get, if you buy fiber specifically for spinning, it will usually come in either roving, batts, or top. Without getting too technical, the way the fiber is prepared affects the characteristics of the finished yarn.
Roving and batts make fluffier yarn and are usually easier to spin, top makes sleeker smoother yarn but can be slippery and harder to control if you’re a beginner.
So, if you’re starting out, you want to get some wool roving. The best kinds of wool to spin for a beginner are Rambouillet, Blue Faced Leicester (BFL), or Romney. These are all breeds of sheep and produce grippy wool which is easier to spin.
If you already found a fiber you want to do that’s awesome!
Once you start spinning and you find yourself struggling to get a continuous strand of yarn going or your fiber keeps slipping out of your fingers, the kind of fiber you have might be the culprit.
Put your spinning on hold and get some wool roving from one of the breeds I listed. Sometimes that little change can make a huge difference.
Alright, enough about fiber, let’s get spinning!
How to Use a Spindle
You’ve got your weapon of choice, and you’ve got your ammo. What I mean is you have your spindle and your fiber and you are ready to spin.
So, let’s finally jump in to learn how to use a spindle. First things first, let’s get that fiber attached to the spindle.
1. Start a Leader
A leader is a piece of sturdy yarn that is attached to a spindle or spinning wheel that is used to get the fiber started.
Starting a leader on a spindle will vary slightly on what kind of spindle you have.
For a top whorl and Turkish spindle, you’ll put your leader below the whorl. On a bottom whorl spindle and most supported spindles, you’ll attach your leader above the whorl.
If you’re confused by this, just remember that when trying to figure out where to attach your leader it almost always attaches where you will wind on the finished yarn.
Some spinners don’t use a leader when they spin with a spindle. They attach their fiber by spinning a small section of fiber out from their fiber supply by hand and using that as a leader.
But, I use a leader on my spindles so I’m going to walk you through it.
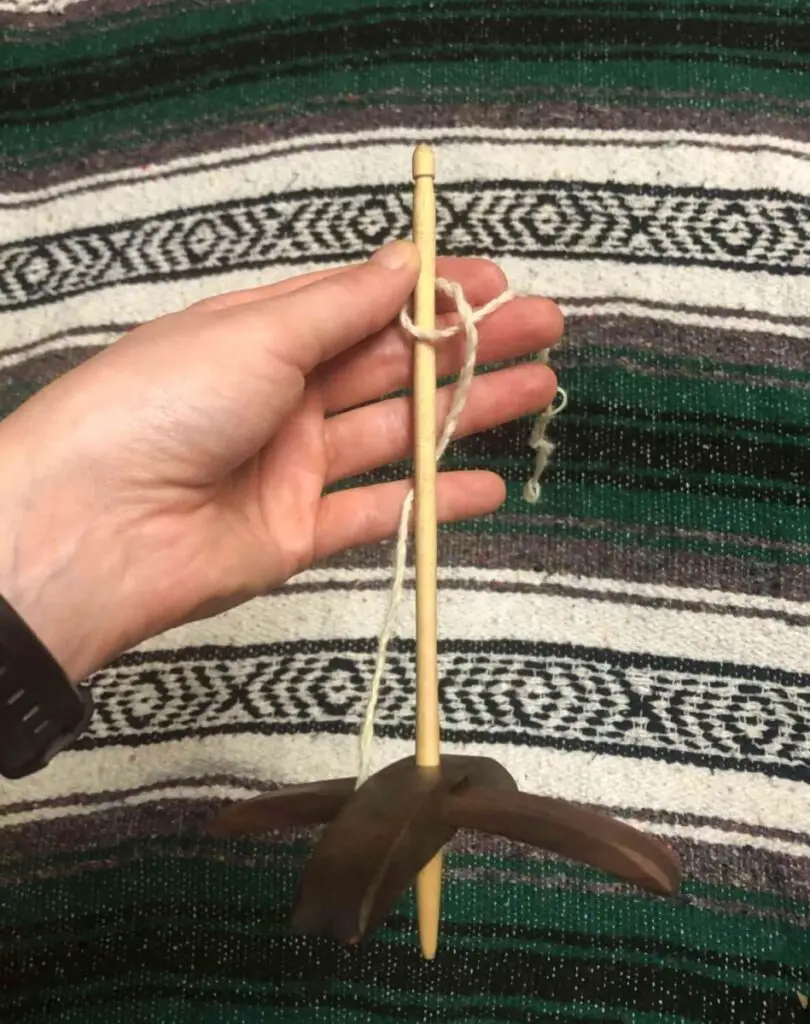
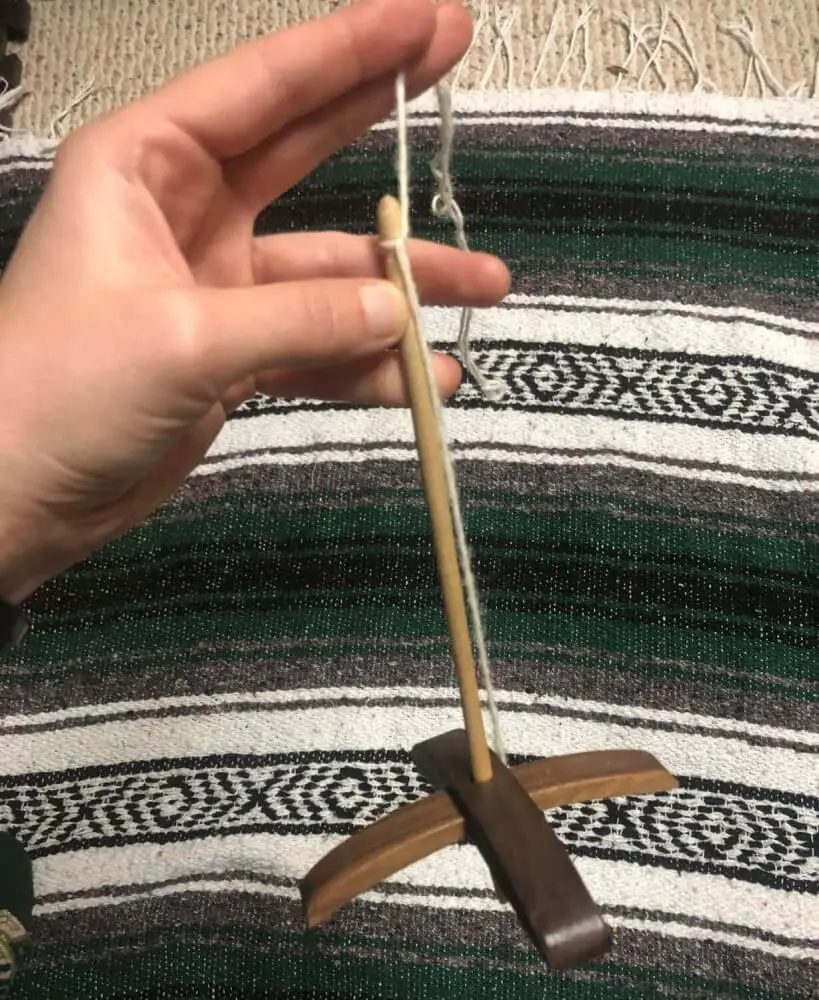
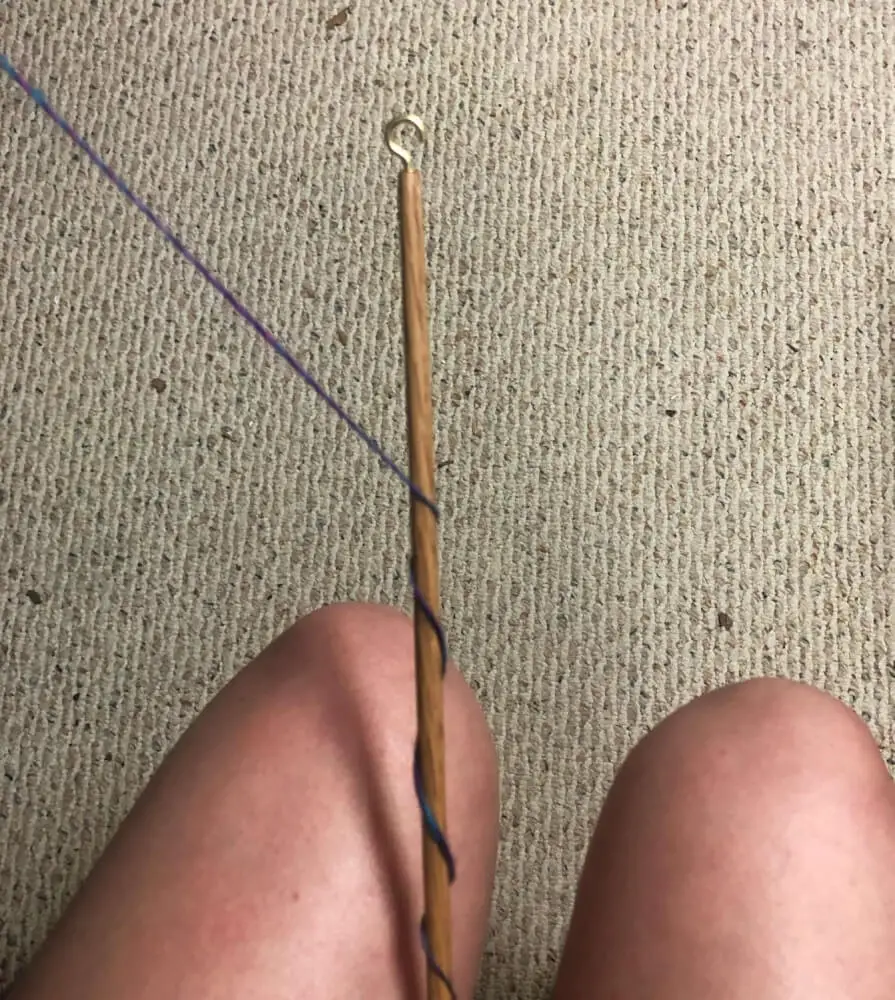
Once you’ve figured out where to attach your leader, tie it on your spindle and wind the leader around the spindle so the end goes through the hook at the end. It’ll look something like this.
If your spindle doesn’t have a hook to loop your leader through, you’ll have tie a half hitch and loop that around the end of your spindle. If you have a notch or low spot on your spindle you’ll position your loop there.
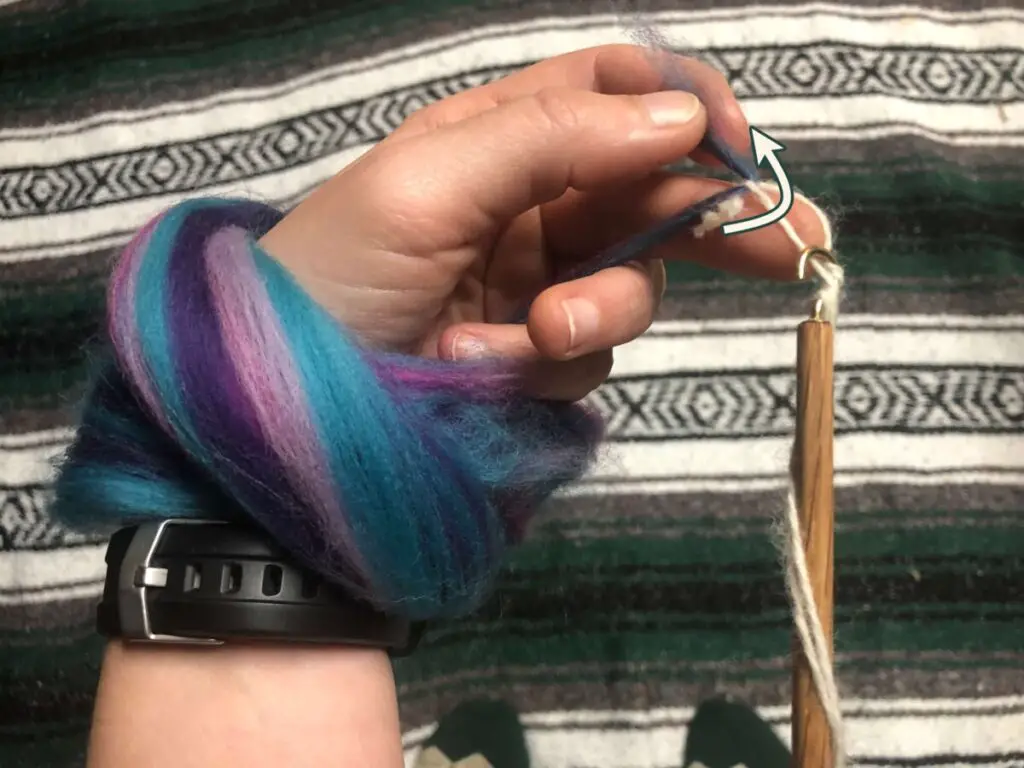
When you make your loop, make sure that the working end of your leader (the end you’ll attach your fiber to) goes under the other end. If that makes no sense, don’t worry, here’s a picture for you.
Now all that’s left is to loop the end of your fiber through the loop of your leader, this will allow the twist in the leader to travel up into your fiber once you’re ready for it.
Woot woot! You’ve got your leader set up and you’re ready to begin.
2. Accumulate Twist
When it comes down to it, yarn is just twisted fiber. So, to make yarn, we have to add twist and to add twist, you have to spin the spindle.
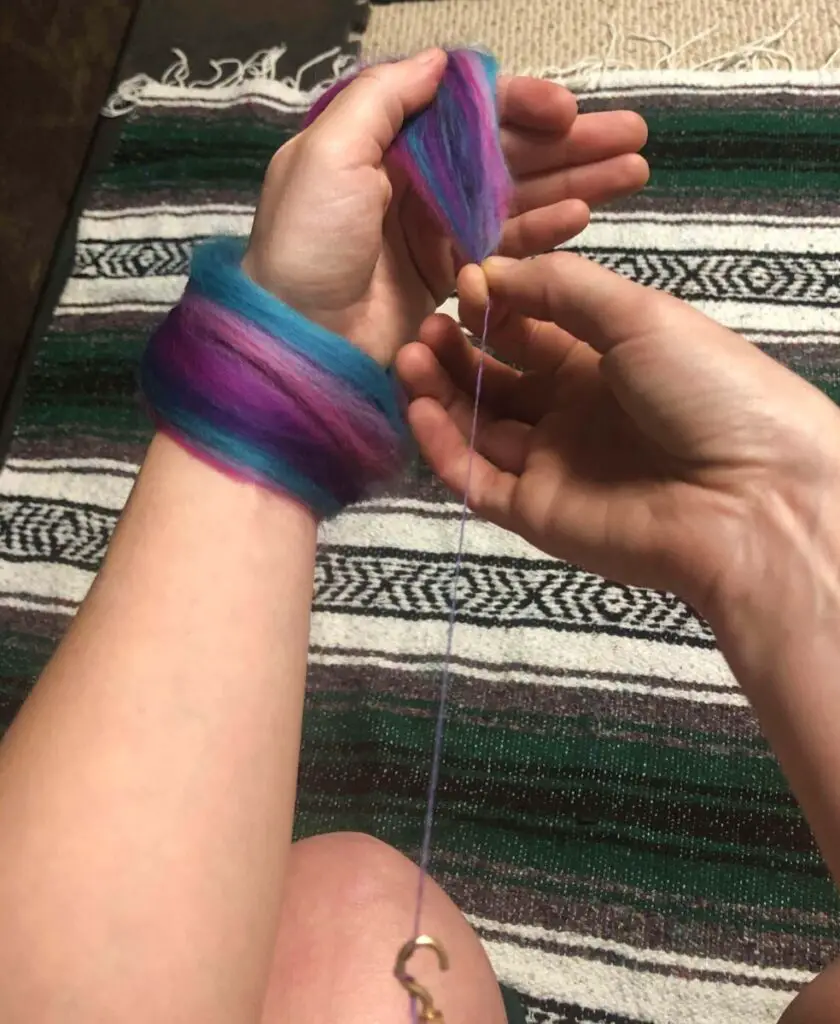
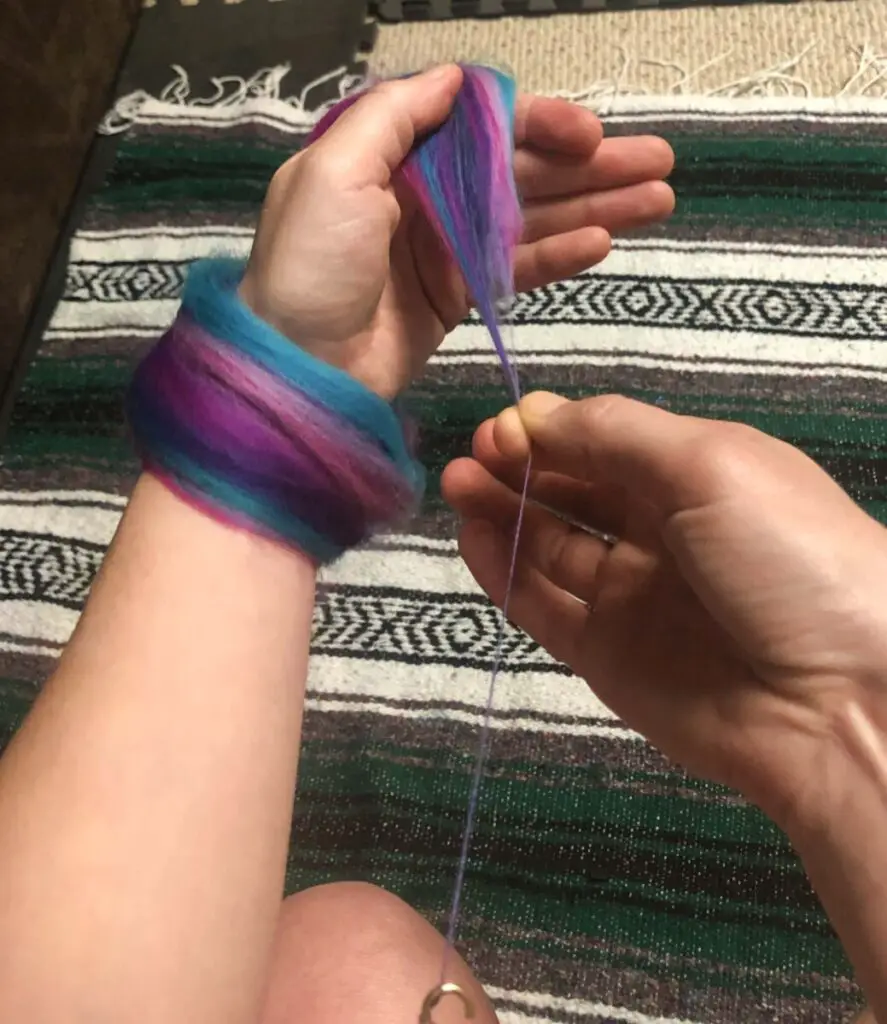
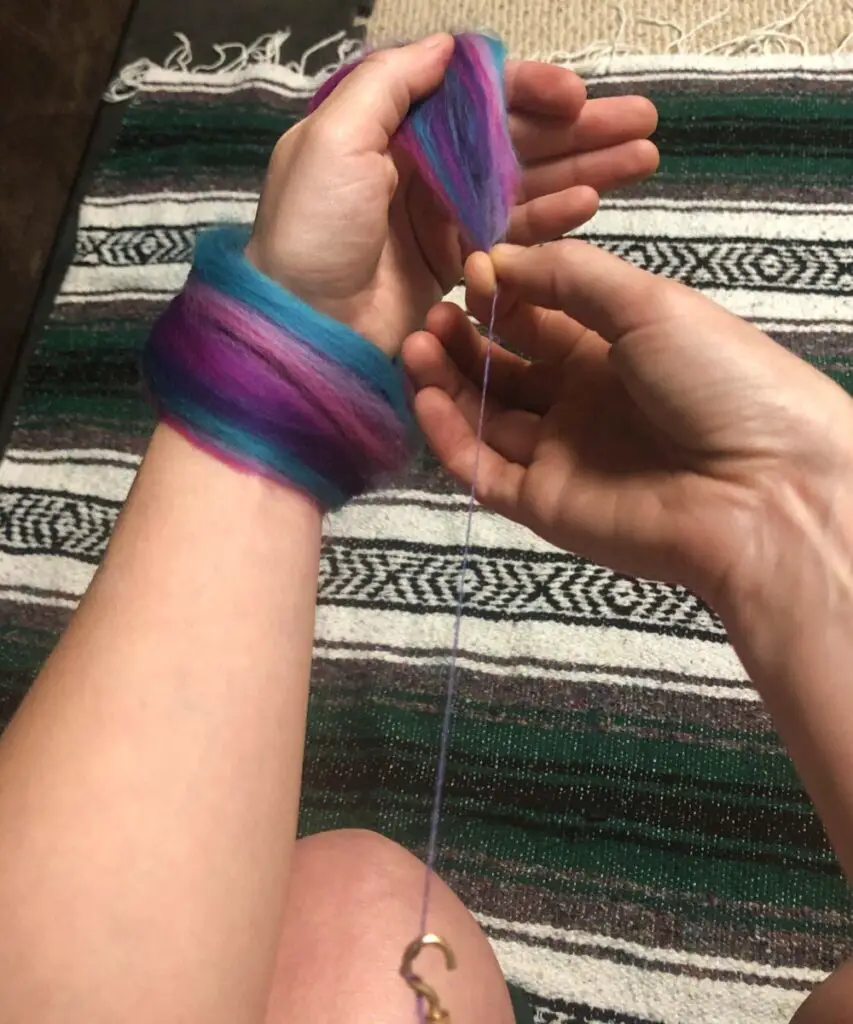
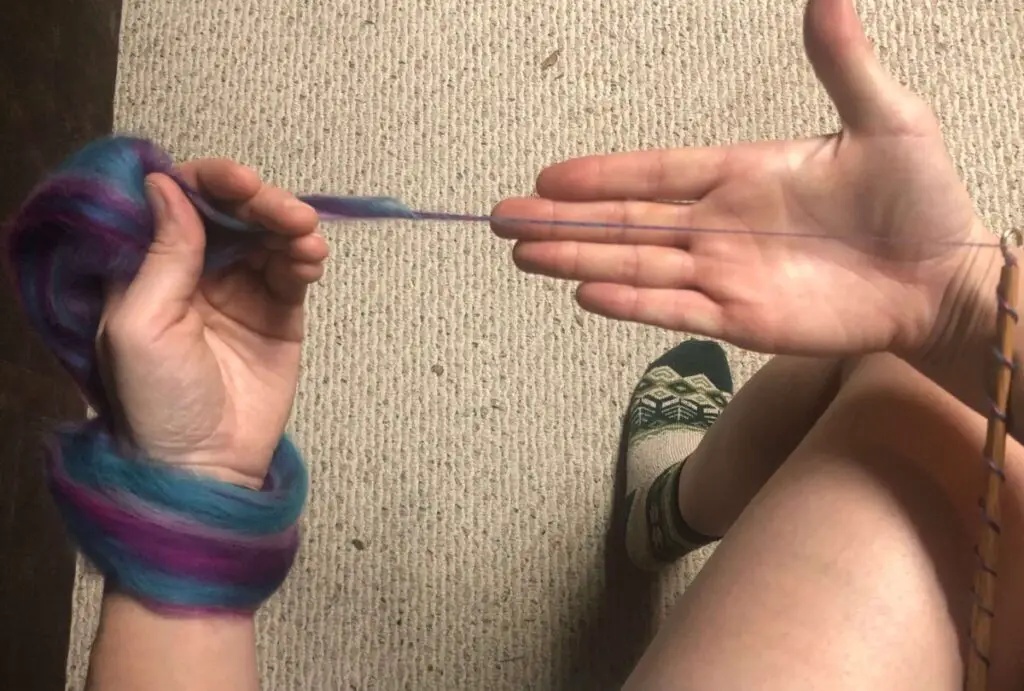
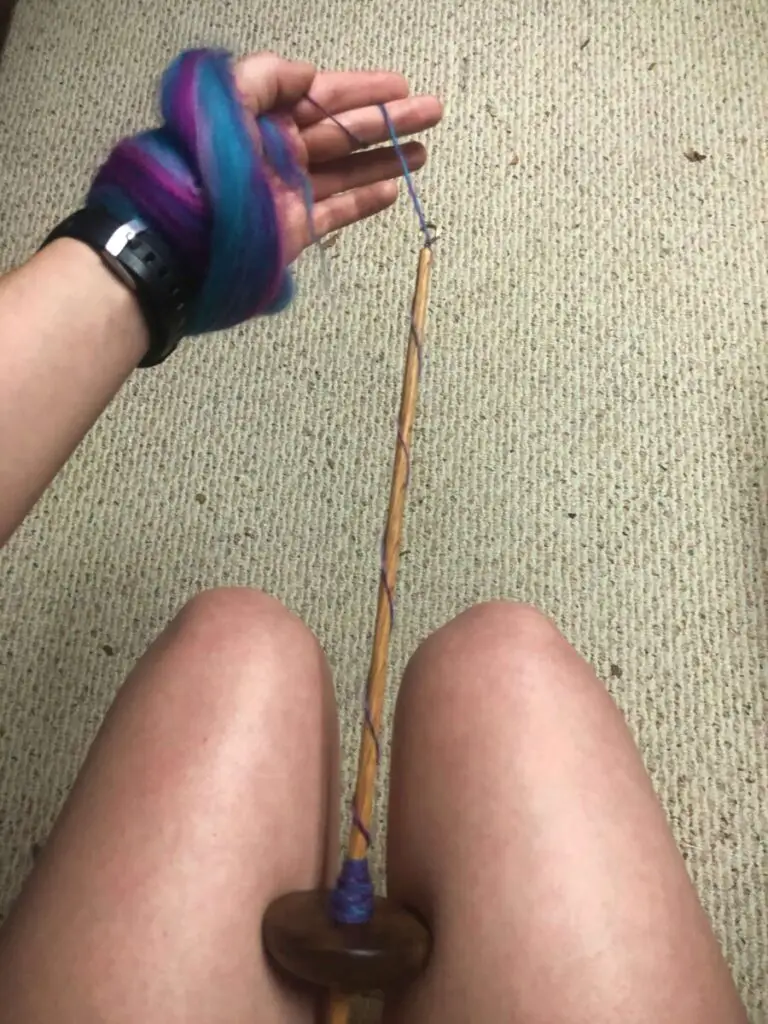
But first, let’s talk about how to hold your spindle. Youll have the leader with your fiber in one hand and your other handing will be spinning/holding the spindle. It’ll look like this.
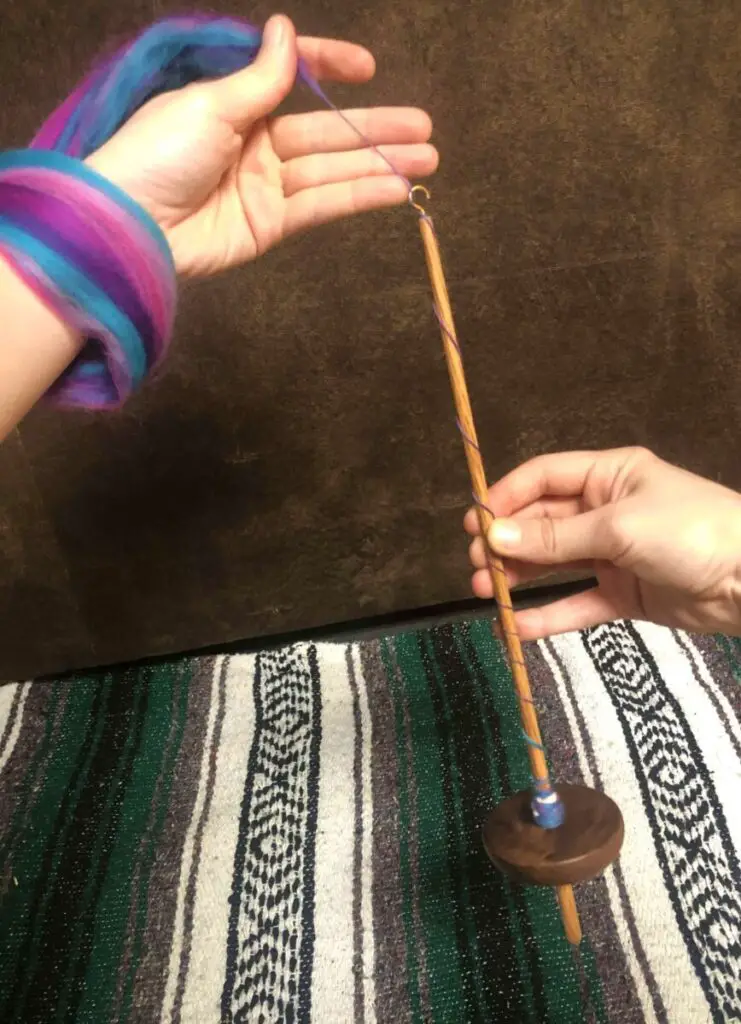
I find it helpful to loop my fiber supply over or around my wrist so the fiber doesn’t dangle and get tangled up in the yarn between your fiber supply and your spindle. It definitely takes some getting used to but keep practicing and you’ll get the hang of it.
Before you start spinning your spindle, you want to pick which direction you’re going to spin. If you’ve never spun before try both ways to see which one feels right. This will be the direction that you spin your spindle the whole time.
The easiest way I’ve found to describe how to start your spindle spinning is to pinch the shaft of the spindle and then bring your fingers past one another as if you were snapping your fingers.
This snapping motion will cause your spindle to spin which will add twist to your fiber. Keep spinning your spindle until you have twist accumulated in your leader.
You’ll know you have enough twist built up whewn your leader looks very tight.
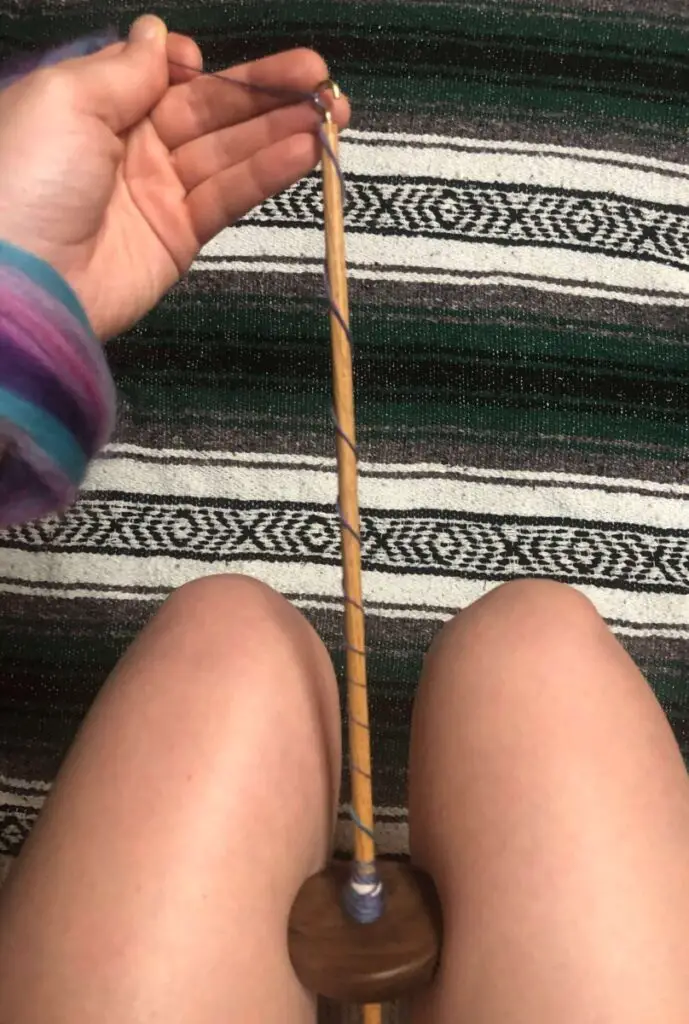
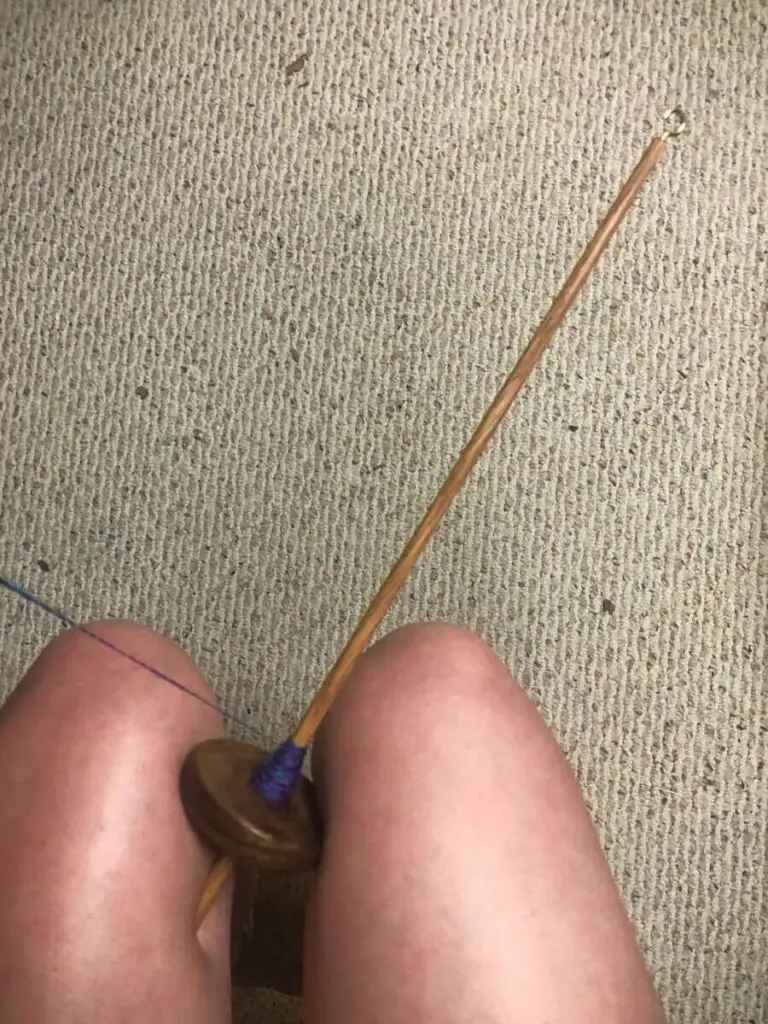
Now that your twist is built up, you’ll want to stop and park your spindle. By parking I mean just put it somewhere where it won’t untwist. The easiest place is just to hold it between your legs like this.
Time to get to the yarn making part of this whole thing; drafting fiber.
3. Draft Fiber
Now it’s time to draft out fiber to distribute your twist and make yarn!
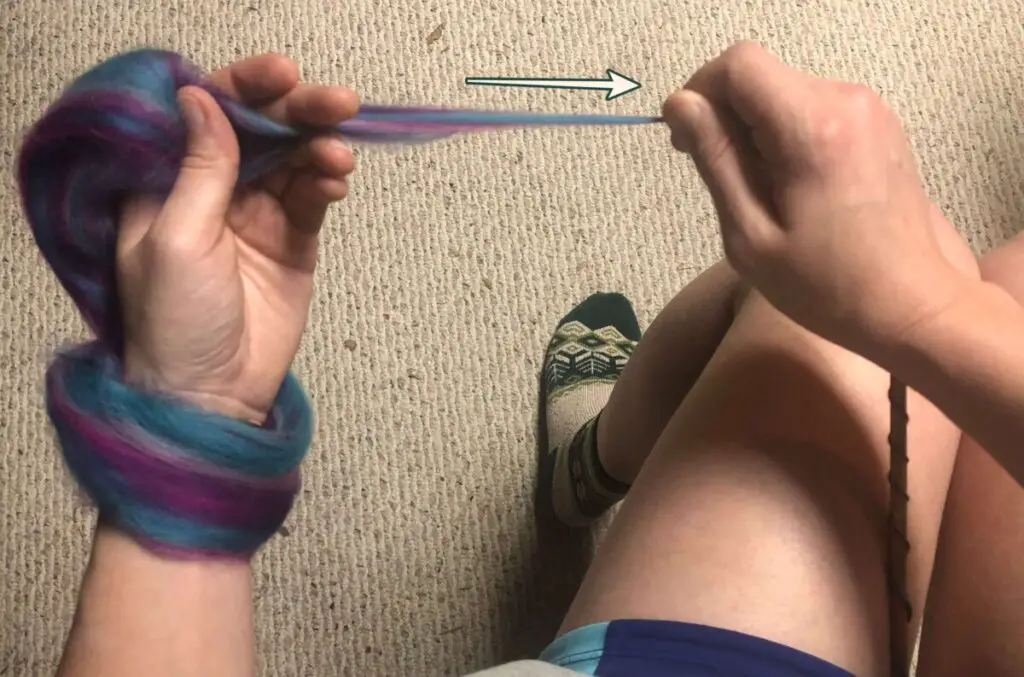
With your spindle parked between your legs, take your spindle hand and pinch the fiber below your fiber supply.
Then, pull some fiber out of your fiber supply and slide your fingers back up until they’re back against your fiber supply.
You want to maintain tension between your spindle and your fiber or your twisted yarn in the middle will get all twisty and hard to manage. So, as you draft, you’ll continue moving your hands upward as you create more finished yarn.
It’s very important to not let your twist get into the fiber supply itself. If you do you’ll get a big clump of fiber in your yarn called a slub.
There’s nothing wrong with slubs and some people make yarn with slubs in them on purpose, but if you’re trying to make regular yarn, you want to avoid these slubs.
The best way to avoid these slubs is to keep your twist separate from your fiber supply by always having your fingers pinched between your fiber and where the twist is. Your fingers act as a barricade for the twist.
If you do get twist in your fiber supply, it’s not the end of the world. You can undo this twist by pinching your fiber supply and twisting your fingers in the opposite direction of the twist. This will ‘unlock’ the fiber allowing you to draft out your slub.

Continue drafting out your fiber until you either can’t go up any further with your hand or there isn’t enough twist left in the middle to keep making yarn.
Now that you’ve got some finished yarn on your hands, it’s time to wind it in your spindle.
4. Wind-On
Winding on your finished yarn is very satisfying. All your hard work has paid off and you created something from nothing, that’s so awesome!!
Now, winding on your spindle varies a little from spindle to spindle but for most spindles you just wrap the finished yarn around the shaft of the spindle.
First, you’ll unhook or untie your yarn and bring your yarn down to the base of the leader or where you finished winding on the last time.
Then, while maintaining tension on your yarn, you’ll slowly twist your spindle to wind the finished yarn onto the spindle.
Wind on your finished yarn until you have just enough yarn left to bring the end back up and hook it through or tie it off to get ready to continue spinning.
The biggest outlier with winding on a spindle is the Turkish spindle. These spindles create some beautiful patterns when winding on but in order to create those patterns there’s a specific way to wind them on.
If you’re using a turkish spindle, check out this video about how to wind on a Turkish spindle.
5. Repeat
And there you have it, you have successfully learned how to use a spindle and you’ve created yarn! Before you keep going take a second to congratulate yourself no matter how ugly you think your yarn is.
All you have to do is repeat the process to continue creating yarn.
As you accumulate more yarn on your spindle, you want to make sure you try to wind your spindle on evenly. If it’s uneven, you can throw off the balance of your spindle which can make it wobble. I’ve tried spinning with a wobbly spindle, it’s not very fun.
Keep spinning and keep practicing and you’ll be a great spinner in no time.
The last tidbit of advice I want to give you is to not be too hard on yourself, it takes time to get good at something new. If you’re struggling with starting this awesome hobby, check out this post to get more words of encouragement.
Wrap Up
Kudos to you, you made it to the end! You learned how to use a spindle!
You got your fiber, you picked out your spindle of choice, and then you used them to make some crazy, cool yarn creation.
For fiber, I recommend that you get roving because it’s easier to spin and then I gave you a few wool breeds that make spinning easier.
Then we discussed the different types of spindles that are out there. It mainly comes down to personal preference so I recommend that you spin some different types of spindles to see which ones you like best.
Then, you just gotta spin.
Accumulate twist in your yarn and then park your spindle and draft out fiber by pinching and pulling fiber all the while making sure that you don’t allow twist into your fiber supply.
If you accidentally make a slub, you can untwist it and even it out and get right back to making yarn.
Once you’ve got a long piece of yarn drafted out, wind it onto your spindle to complete the process.
Rinse, repeat, and go make something awesome!!