Gorgeous table runners, fun fabric, homemade scarves; what’s not to love about weaving? If you’ve seen some of the things you can create with a loom, you might be interested in getting started with weaving. So how do you start weaving?
There are a few ways you can get into weaving; take a class, borrow or rent a loom to try, make a loom at home, or buy a loom. Then, pick a pattern or style for your type of loom and start creating.
In this post, I’ll tell you about the four main ways to get into weaving as well as a quick beginner’s guide to the different types of looms, some weaving vocabulary, types of yarn you will need, and some common weaving stitches to try.
With all that to cover, we better get started!
Table of Contents
How to Get into Weaving
Getting into weaving can be daunting for those on the outside looking in, but weavers are a welcome community and will love to teach you what they know. Don’t be afraid to ask questions!
To start weaving, you can take a class, borrow a loom to try, make a loom yourself, or buy a loom and give it a try.
Let’s start our list by talking about taking a class.
1. Take A Class
There are two ways you can take a weaving class: take an in-person class or take an online class.
In Person Class
Taking an in-person class is probably one of the best ways to learn weaving. The main benefit of this is you will get face-to-face instruction from a weaving expert who would love to answer all your questions.
Another benefit to an in-person class is that sometimes a loom may be provided for you. Check the class details to find out.
Many places also do workshops which is a great way to go explore and they are more likely to provide the needed materials for you.
I did a quick search for ‘weaving classes near me’ and got some great results. The most common place that will have weaving classes is a weaving guild which is just a fancy word for a weaving club.
If you live near a large city, you’ll be more likely to find options, if you’re like me and tend to live in the middle of nowhere, they might be harder to come by. But, that’s when taking an online class comes in handy.
Online Class
There are a ton of resources online that offer weaving classes. Here is a link to the Kelly Casanova Weaving Lessons website. She has a wide variety of resources from free classes to paid subscriptions that answer just about everything you need to know about weaving.
Another option is the Oxford Weaving Studio, they offer a great range of weaving lessons by difficulty as well as type of loom. Their classes might be on the pricier side so you might want a cheaper option to try first.
If you want an even easier and completely free way to learn to weave, I have one answer for you: YouTube.
YouTube has a ton of videos about weaving, if you haven’t already checked it out, I recommend doing a YouTube search for learning to weave.
When I started with a Rigid Heddle Loom, this is the video that I watched to learn everything I needed to know about my loom.
Before you do this search, I recommend choosing what type of loom you want to start with. If you don’t, the results can be overwhelming.
If you don’t know what type of loom to try first, check out my section below that describes each type of loom so you can decide which one fits your needs and your budget or borrow a loom from a friend to try.
2. Borrow/Rent A Loom to Try
If you know someone who weaves, then you’ve already got an in. Ask if you can come over and try weaving or, if their loom is small enough, ask if you can take it home for a while. This is a great way to try before you buy.
When I started weaving, I didn’t know anyone. But now, I’m the weaver that people know! So, I’ve had the opportunity to share my loom and knowledge with other people which is great.
Don’t be nervous to ask weavers or fiber artists questions about their crafts, we love sharing our knowledge and passion with others. Plus it’s fun to turn someone to the dark side and get them addicted to the craft.
If you don’t yet know anyone who weaves, you may be able to rent a loom to try.
Some weaving guilds have looms on hand to rent out and some weaving shops have a similar program. Check in your local area to see what options are available.
If none of those are an option, you can try making a small loom yourself.
3. Make Your Own Loom
There are a few small looms that you can make yourself for pretty cheap. The two types of looms that are easy to make are a frame loom and a pin loom.
A pin loom is a small square loom that’s used to make hot pads, mug rugs, and small woven squares that can be combined into larger projects.
If you want to learn how to make your own pin loom, I have a post that walks you through how to do it that you can find here.
A frame loom is usually used to create tapestries or wall decorations. You can create a simple frame loom out of an old picture frame or even out of a piece of cardboard.
Here’s a great YouTube video about how to make a cardboard loom.
Alas, if none of the above options work for you, one possibility remains, you can buy a loom.
4. Buy a Loom
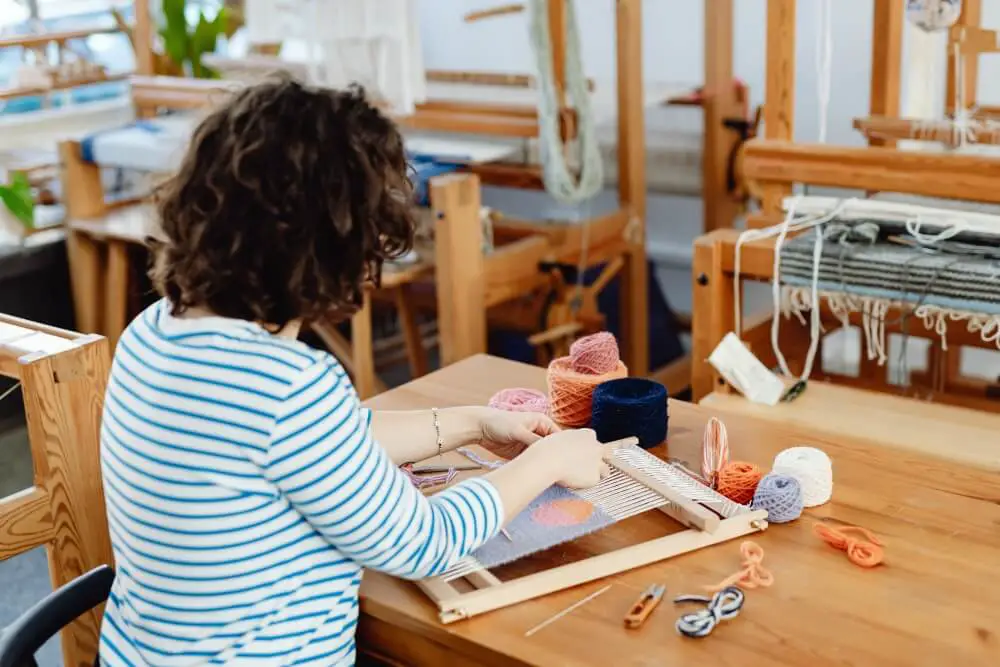
I’m a very all-or-nothing person, so when I wanted to get into weaving, I just bought a loom. I knew it was something I would enjoy so I went all in.
I started with a small rigid heddle loom and I love it.
But, there are a ton of different types of looms out there ranging from twenty dollars to several thousand. If you’ve decided you want to get a loom, then the first thing you need to do is pick what kind of loom you want.
The best way to do this is to ask yourself what kind of thing you want to make and what size of thing you want to make.
If your primary goal is to experiment with wall hangings, decorations, or tapestries, then you want a frame loom.
If you want to create scarves or lengths of fabric, then you want a rigid heddle loom or a floor loom depending on the size you want and what you can afford. Floor looms are huge and expensive, one day when I have more space, I’m going to buy one.
If you want to create belts and bands with complex patterns, then look into an inkle loom which is another loom I hope to buy someday soon. We fiber artists can never have too many toys!
For a better description of the types of looms out there, keep reading to learn all about the tools and terms used in weaving.
Weaving Terms and Tools 101
If you’re researching looms and weaving tools, or watching YouTube videos to learn about weaving, you might get a little lost with all the words and terms being used.
So, in this section, I’ve given you a breakdown of the most common weaving terms, all the different types of looms, different types of yarn used in weaving, and the most common basic weaving techniques.
This will give you a foundation to jump into the great craft of weaving, let’s get to it!
Weaving Vocabulary
We’re going to start with the most common weaving terms that are used in just about every kind of weaving.
There will be more specific terms that you will learn depending on what types of loom and what type of weaving you will be doing. But this will give a good base to get started with.
- Warp: the yarn on the loom that goes up and down under tension and is the foundation of the weaving
- Weft: the yarn on the loom that goes side to side and is woven through the warp to create a pattern
- Pick: the pattern used for each row of weaving, denotes which threads are ‘picked’ up to create the pattern
- Heddle/Heddle Bar: The bar that the warp threads are strung through that is lifted up and down to create each pick. This only exists on rigid-heddle looms and some floor looms.
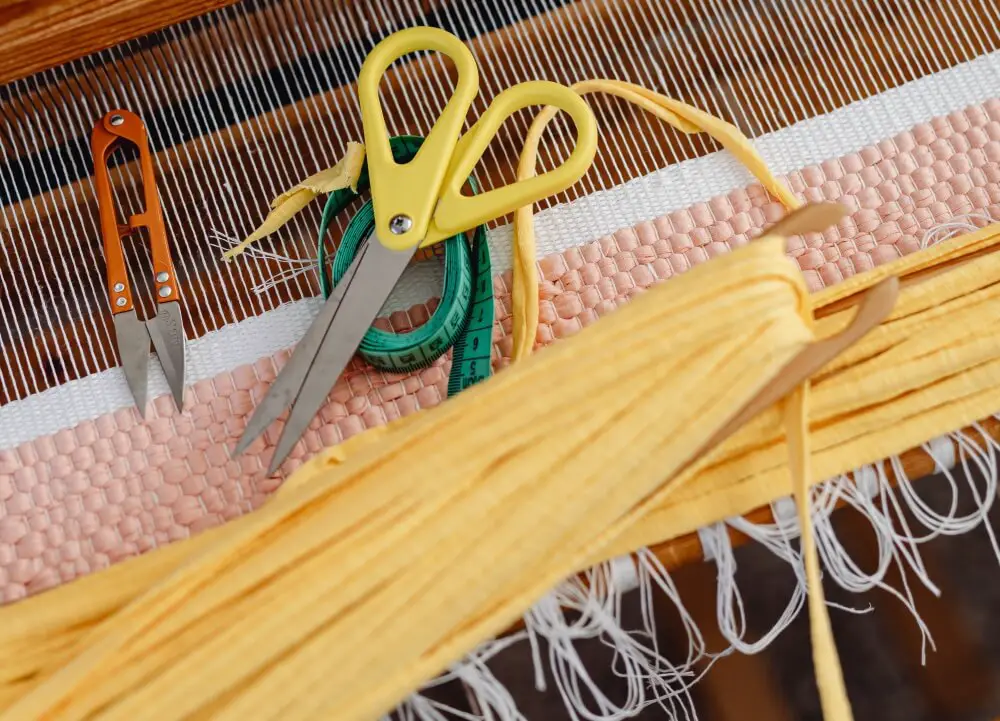
- Beater/Tapestry Beater: the device used to press down each row of weft thread to ensure the weaving is tight, you could even use a fork as a beater
- Shed stick: A stick or flat object used to pick up warp threads to pass the weft thread through
- EPI/DPI/Sett: EPI (Ends per inch) and DPI (dents per inch) or sett are the terms used to describe how many strands of warp threads appear per inch. In other words, it’s how close together your warp threads will be. The higher the number, the more warp threads will be in your weaving.
- Selvedge: The edges or sides of the weaving
- Shuttle/Stick Shuttle: A stick or device that the weft thread is wound around that makes it easier to pass the weft thread through the warp threads
Types of Looms
There are a ton of different types of looms ranging in size, style, and price. This is a breakdown of the different types of looms that are out there.
I won’t go into too many specifics, just enough for you to know what kind of loom might be best for you.
Full disclosure, I only have experience working with a frame loom, a rigid-heddle loom, and a pin loom. Everything else is knowledge I’ve gathered from books, videos, and other resources.
Backstrap Loom
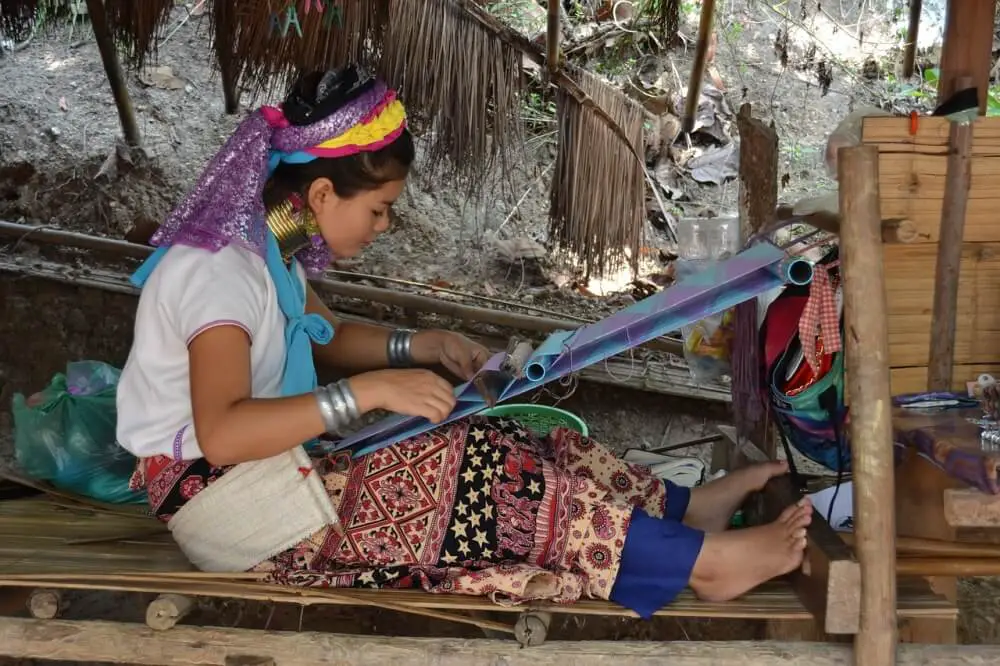
A backstrap loom is a type of loom that has historically been used most often in Central and South America with special focus being given to the weavers of Guatemala in recent years.
The warp is wound between two rods of wood and one end of the weaving is attached to a fixed point and the other end has a strap on it.
Weavers put this strap around their backs and lean or sit on it to create the tension in the weft thread that is needed to create an even weave.
Once the tension is created through the backstrap, the weavers create the desired pattern on the end closest to them and work their way up.
I have watched some great videos of Guatemalan weavers creating gorgeous fabrics on backstrap looms. They’re longer videos but definitely worth a watch in you’re interested in the possibilities of the backstrap loom. You can find the first video in the series here.
How they come up with or remember the pattern they’re creating, I will never know, but I will never cease to be amazed by it.
Floor Loom
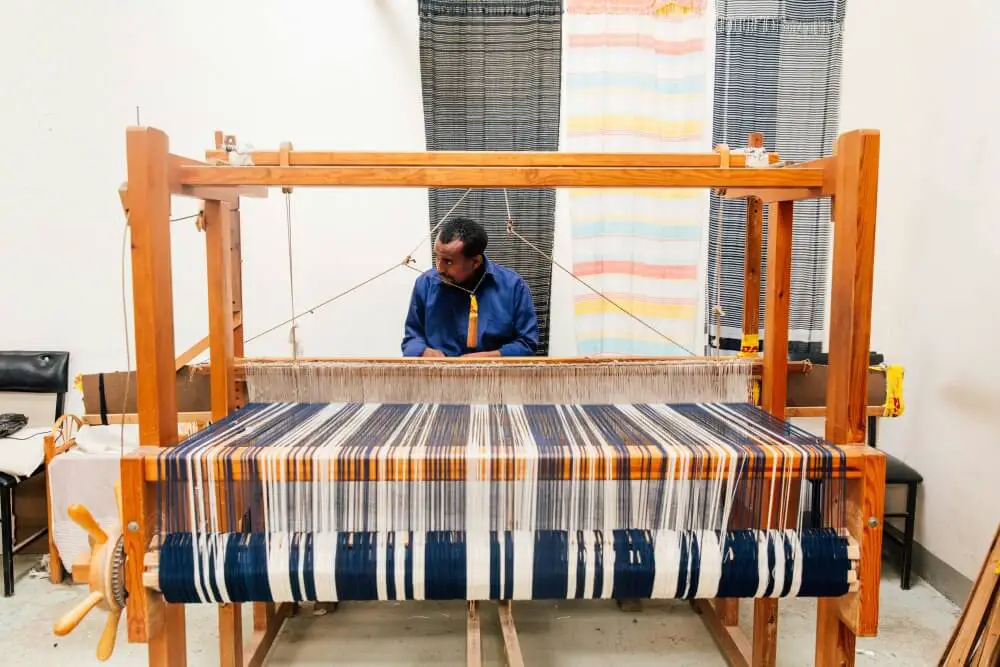
A floor loom is the largest kind of loom there is. If you picture someone weaving on a loom in medieval times, this is probably the kind of loom you picture.
This big loom is used to create wide fabrics that can be sewn into garments as well as larger items such as blankets or wool carpets. Industrial looms are a type of floor loom although automated.
There is a wide variety of floor looms which range in size and how many heddles and foot pedals there are. The multiple heddles allow for a wider range of patterns without having to manually pick up each thread.
Because of their sheer size, floor looms can be extremely expensive with some of the cheaper ones still being several hundred dollars.
For beginner weavers, a floor loom is probably not the best place to start since it’s an investment in both money and space.
However, if you fall in love with weaving and are looking for a loom that can create larger fabrics or items than the other smaller looms on this list, then looking at a floor loom is a great option.
I plan on getting myself a floor loom once I have enough space to support one.
If you’re looking for one on the cheap, I would recommend checking online marketplaces such as eBay, Facebook Marketplace, and Craigslist. These are great places to find a floor loom for a reduced price although they may be in different states of repair.
Frame Loom
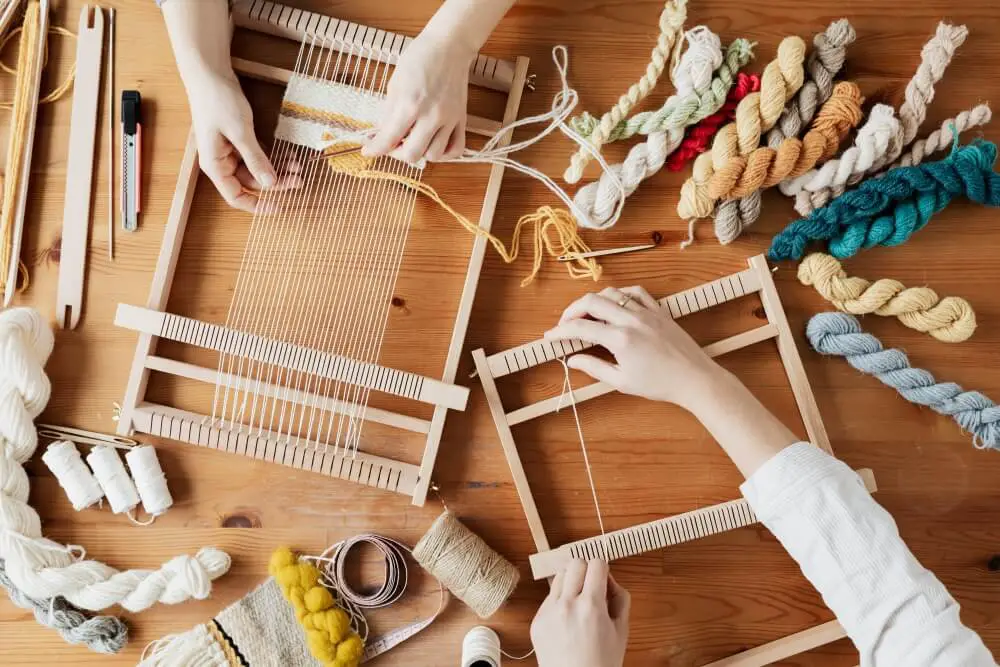
A frame loom is a great option for beginning weavers, they’re versatile, relatively cheap, and you can make your own if you don’t want to buy one.
This weaving loom is primarily used to create tapestries or wall hangings, but if you have one large enough you could also use it to create rugs.
There are larger frame looms that professional weavers use to create complex tapestries. But, you can make a frame loom using a picture frame or buy a small one which is also sometimes called a lap loom.
This style of loom is simple to use but allows for a lot of creativity so it’s a great way to start exploring the craft of weaving.
If you’re interested in how to make your own frame loom out of a picture frame, here’s a great how-to video by Fibers and Design Weaving.
Inkle Loom
An inkle loom is an interesting one. It’s one of the oldest looms that has been used and it can only be used to create bands, belts, and thin pieces of fabric.
But, don’t let that fool you, the patterns you can create on an inkle loom are phenomenal. An inkle loom is used for what’s called card weaving or tablet weaving.
Instead of using heddles or picking up each thread to weave under, you thread your warp threads through cards and then turn those cards into specific orientations which creates the gap for you to pass the weft thread through.
The turning of the cards creates twist in the weft thread which is what holds this type of weaving together.
Sounds confusing in words, but seeing it in practice seems too simple to be able to create these crazy patterns.
Here’s a video from Elowys of Finchingfeld that shows what tablet weaving is all about, it’s a bit of a long watch but it’s the best one I’ve found to explain tablet weaving.
If you’re a beginner and you’re interested in making things like belts, camera or guitar straps, or patterned strips of fabric for accents on garments, then the inkle loom is for you.
They take up less space and are less expensive than some other looms which is another reason why they’re good for someone just starting.
You also don’t have to buy the cards, you can make them yourself using an old deck of playing cards.
Pin Loom
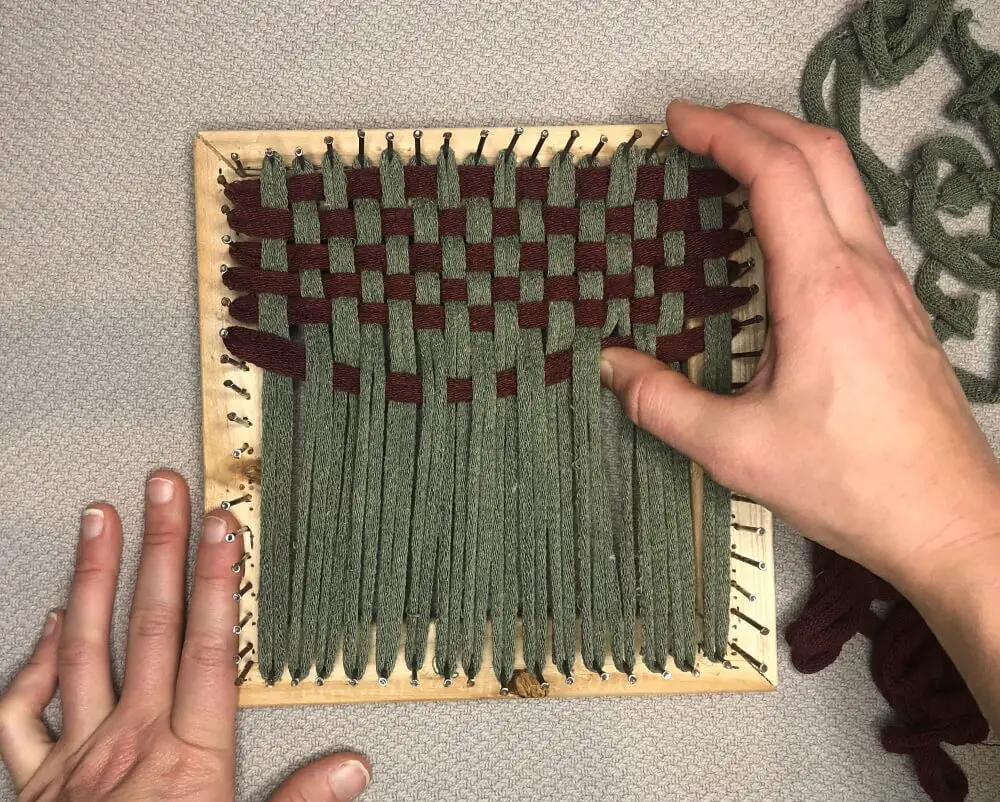
A pin loom is a small loom that has pins around the outside that you wrap yarn or cotton loops around to create the weaving pattern.
These small looms are used for small projects such as potholders, mug rugs, and creating small squares that can be sewn into other things.
This loom is not as versatile in the number of patterns you can make in the weaving itself but it’s versatile in that you can make different patterns with the colors and by sewing together the different squares.
The great thing about a pin loom is that it’s cheap and you can make your own with some nails and an old square frame. I have a blog post all about making a pin loom that you can find here.
If you’re looking for a great starting loom, then the pin loom is a good low-cost option to introduce you to some of the tools and techniques of weaving.
Rigid Heddle Loom
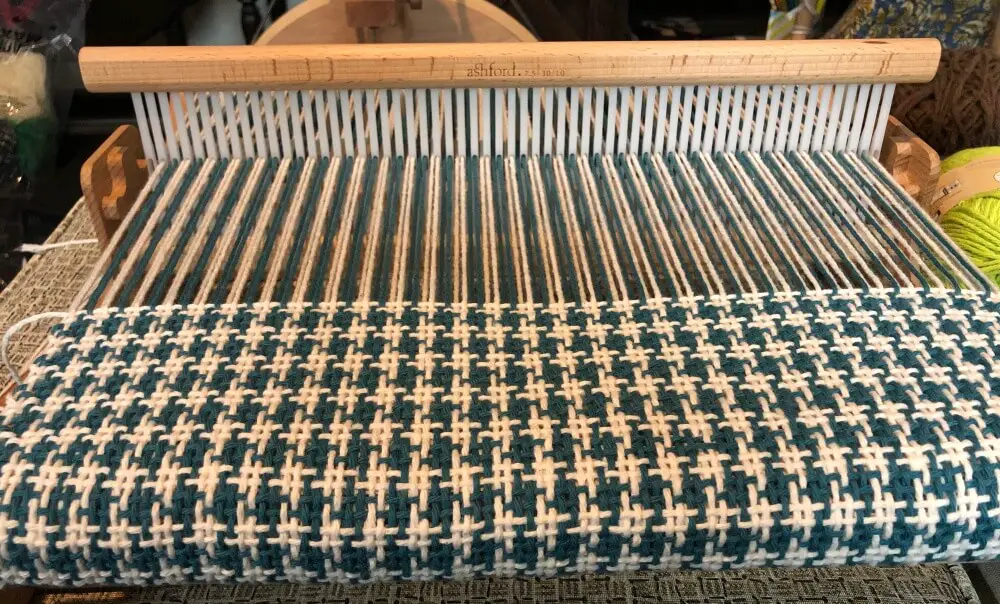
The rigid heddle loom is a loom that has heddles that the yarn is threaded through. These heddles are then lifted up or set down to separate the warp threads to allow the weft thread to pass through.
The heddles make it quicker to make the weaving pattern since you don’t have to pick up each individual thread. But, to create more complex patterns, you may still pick up threads on some rows.
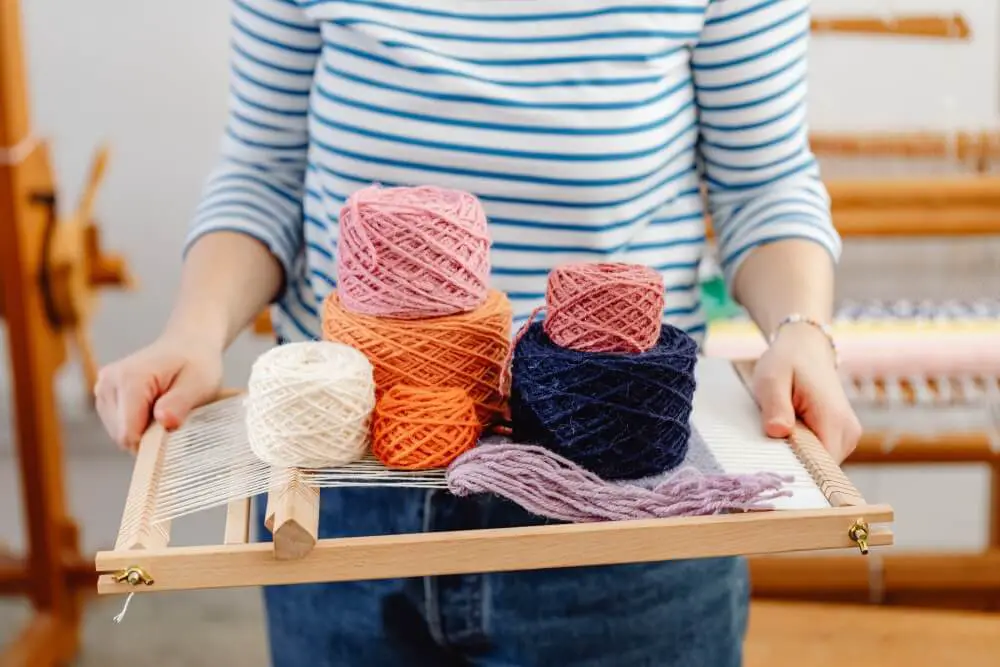
Rigid heddle looms come in many different sizes from small table looms like mine pictured above. Many floor looms are also a form of rigid heddle looms.
I started with a rigid heddle loom, but, I would recommend trying a frame loom or a cardboard loom to make sure weaving is something you will enjoy because rigid heddle looms can be on the expensive end.
But, if you’ve already tried weaving and want something that’ll give you versatility, then a rigid heddle loom is a great option.
Types of Yarn
Along with the type of loom you use, you also need to be aware of the types of yarn you might use for your warp and weft thread.
Warp Yarn
The warp is the yarn that goes up and down on the loom and is the one that is put under tension during weaving.
Because of this, your warp yarn has to be strong so that it doesn’t break under the tension of the weaving.
Below is a list of yarns that are good options for warp threads so you can make sure you choose the right yarn.
- Cotton yarn
- Linen Yarn
- Cotton and linen blended with other fibers
- Strong wool yarn
- Thicker yarns
- Multiple ply yarns
You can use other yarns you just have to be careful not to put them under unnecessary strain which might cause them to break. Broken warp threads are annoying at best.
You can test your warp yarn by taking a strand and trying to break it between your hands, if it doesn’t break easily, then it’s a good option for warp yarn.
But, don’t worry, any threads you can’t use in the warp, you can use in the weft which we’ll talk about next.
Weft Yarn
The weft yarn is the yarn that goes back in forth between the warp threads and is not under tension. This means that you can use any kind of yarn you want in the weft.
The possibilities of weft thread are endless but here are some good yarn options to use in the weft.
Switching up your weft threads throughout the weaving is a great way to create different textures in a single object.
Now that you have your loom and your yarn, the last thing to know is about the most common weaving stitches used in weaving.
Common Weaving Stitches
When it comes to weaving, the possibilities of patterns are endless. But, for just starting out, here are some of the most common weaving stitches used in weaving.
Plain Weave/Tabby Weave
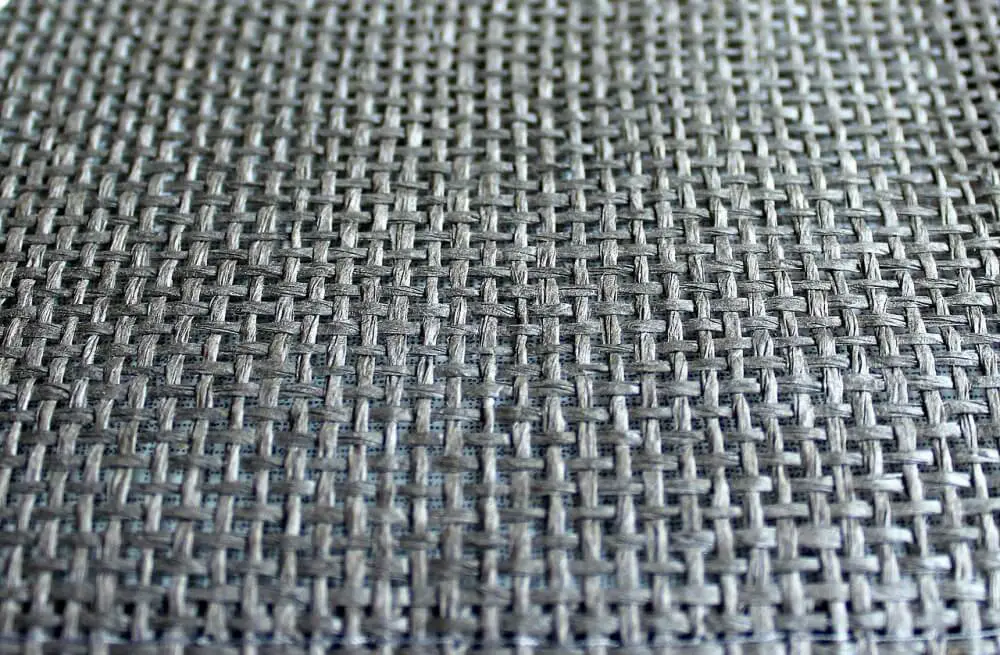
Plain weave or tabby weave is the easiest and most common stitch in weaving. It’s the traditional over one under one pattern.
I use this stitch a lot when I’m weaving with a yarn I want to show off such as an art yarn. This stitch lets the yarn shine and create the finished look as opposed to highlighting the pattern.
This stitch also creates a very strong weave which is great for objects that will get a lot of wear and tear like dishcloths.
Basket Weave
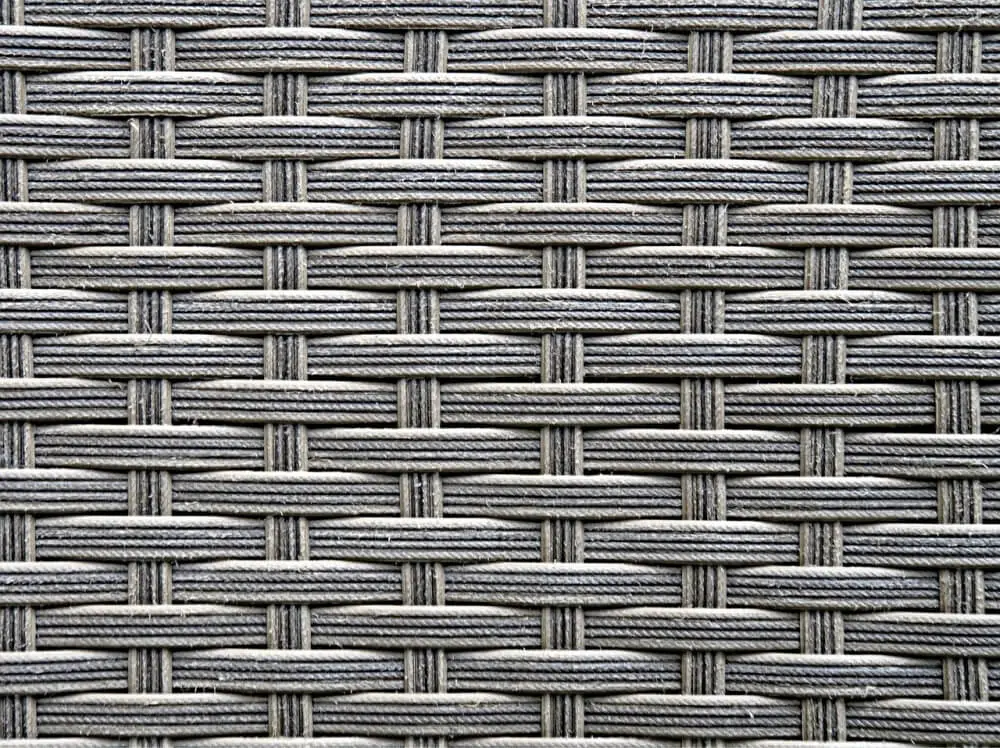
Basket weave, also known as hopsack or matt weave, is the pattern created when you go over and then under multiple weft threads as opposed to over one and under one like in plain weave.
As the name suggests, this pattern is used a lot in weaving baskets.
Rya Knot
The rya knot is a stitch that is tied on as opposed to woven in and allows you to create fringe in the weaving.
Rya knots are used frequently when creating tapestries but can also be used in any other object you weave as a way to create some flare.
Here’s a video that shows you how to create a rya knot so you can see what I mean.
Soumak
The Soumak stitch is one of my favorites. Instead of weaving over under, you wrap the yarn around the threads in a certain way.
When you put two of these rows on top of one another, it gives the appearance that the weave is braided as opposed to woven.
It creates a strong weave and a unique pattern, I use this stitch when I weave rugs on a frame loom. I use t-shirt yarn and this stitch creates a great strong weave while also giving a unique pattern.
Here’s a video to show you how it’s done.
