Wool dryer balls are the next big thing in eco-friendly homes and with good reason. But, you may not want to shell out the money to buy your own and you just so happen to have a pile of old wool clothing or yarn you need to use. Well, you’re in luck, because it’s super easy to make wool dryer balls.
To make wool dryer balls, gather some wool and some pantyhose. Form your wool into tight balls about the size of a baseball. Then, put the formed balls into the pantyhose and tie a knot between each ball. The last step is to run the pantyhose through the washing machine and dryer 2-3 times until the balls are felted.
That’s a short and sweet overview of how to make wool dryer balls. Let’s dig in and talk about everything you need to know about how to make wool dryer balls.
Table of Contents
How to Make Wool Dryer Balls
1. Gather Materials
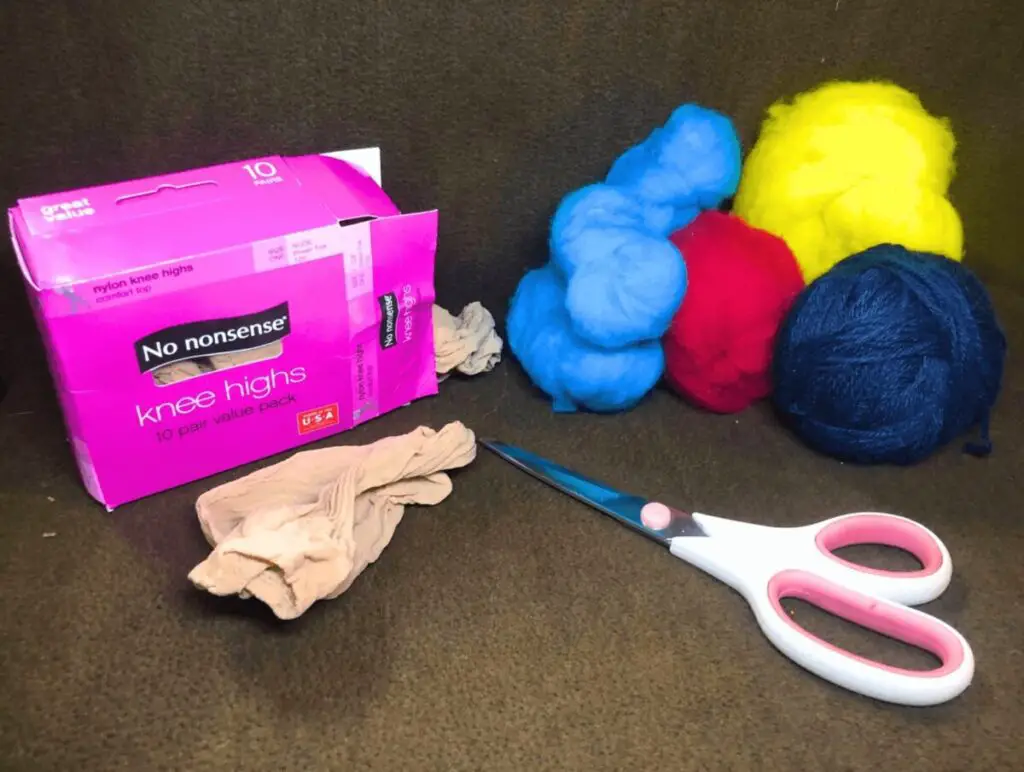
Just like any good crafting project, you need to gather your materials before you can start.
You will need some pantyhose, a compression sock, or even an old tube sock. Just something to put your dryer balls in. I have found that pantyhose work the best, they’re thin, stretchy, and cheap.
The only other things you will need are a pair of scissors and, of course, the wool.
Scissors can be any type you want, you only need them to cut the pantyhose when you’re done.
There are a lot of options for what wool you can use, let’s look into all of them.
Wool Yarn Vs. Wool Scraps Vs. Wool Roving
We’ve got three main types of wool materials that you can use to make your dryer balls: wool yarn, wool clothing scraps, and wool roving.
First up is wool yarn.
One of the easiest materials to get a hold of, you can get it at virtually any craft store. Or, if you’re a crafter like me, you might already have some wool yarn laying around that you need to use.
Any kind of wool yarn will do as long as it’s 100% wool.
Another material that can be easy to come across is wool scraps. By wool scraps, I mean pieces of fabric from wool clothing.
You can use pieces from a wool sweater you have that needs to be retired or you can go to a thrift shop or second-hand clothing store and look for wool clothing.
I’ve repurposed old wool sweaters before, they can be super cheap and yield a lot of materials. In order to make them usable for dryer balls, just cut the fabric into strips.
Last but not least, you can also use straight wool roving. Wool roving is commonly used by spinners to make yarn. But, it’s also used for various other crafts such as felting and arm knitting.
You can buy roving from most spinning and weaving shops as well as online in many places. Just make sure that the roving or roving yarn you get is 100% wool.
If you’ve got a variety of all of the above materials, you can easily mix and match them to make your dryer balls.
Now that we’ve gone over all the materials you need, let’s jump into the fun part, assembling the dryer balls.
2. Assemble the Dryer Balls
No matter what wool material you use, the assembly of the dryer balls is pretty much the same. You just need to roll it into a ball.
You want to form your dryer balls into about the size of a baseball. They will shrink a little bit when they’re put through the washer and dryer.
For my dryer balls, I used wool roving. Mostly because I have a lot of various scraps laying around from all my spinning adventures.
If you’re using wool yarn or wool roving, you’ll follow the same method I’ll show just with different strips of material.
Now let’s get started!
1. Form the Center
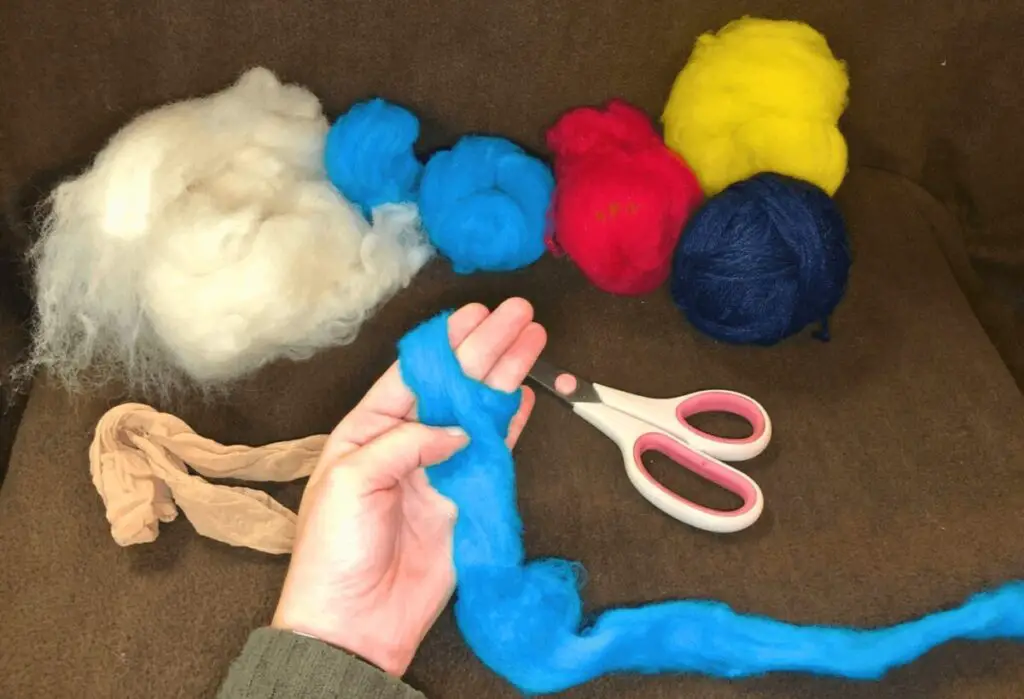
The most important part of forming the dryer balls is the center, you want to make sure the center of your dryer balls is nice and tight.
This is harder to do if you’re using a bulky material such as wool roving or strips of wool fabric.
Start by wrapping the material around your fingers a few times.
Then you’ll pull the loops off your fingers and fold them over. Now that you’ve got a little bundle, wrap the material around the middle to build your ball.

Make sure that you make it as tight as you can with your given material. A tight center will make for the perfect dryer ball.
2. Wind the Ball
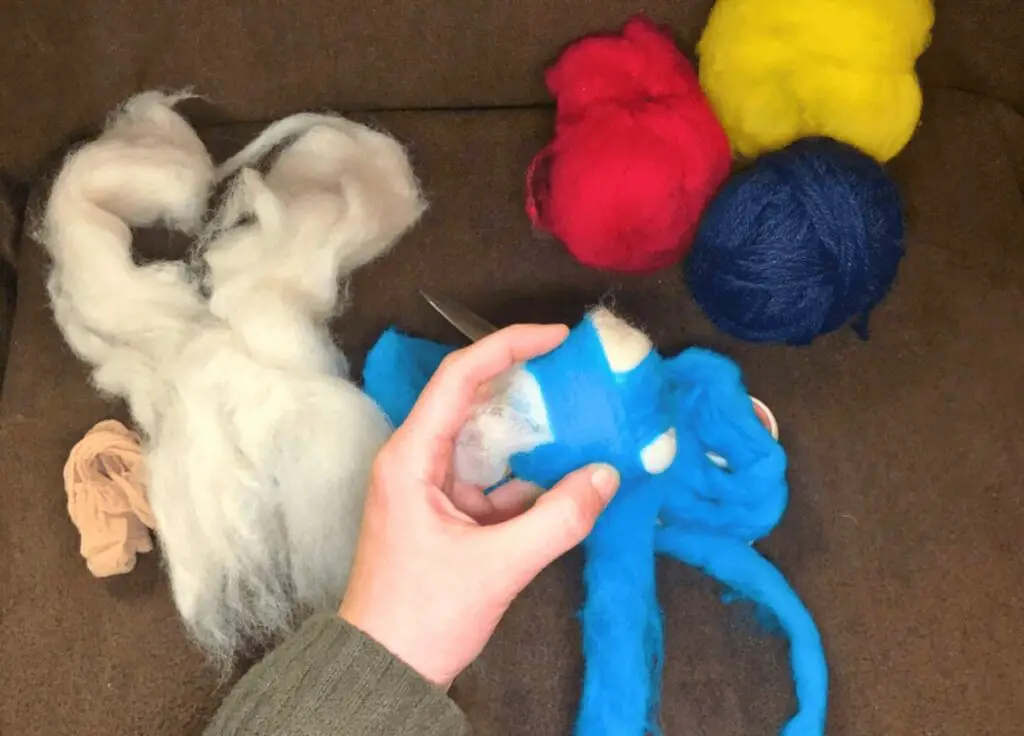
Now all you do is just continue wrapping your material around the beautifully formed center you just made.
Keep rotating your ball so that you evenly distribute the material in a circular shape.
If it’s not perfectly circular, that’s okay! That’s how you know it’s homemade.
As you can see from my ball, I used a few different pieces of roving, I had a bunch of leftover pieces from spinning projects.
When I got to one end of a strip, I just put the end of the next strip on top of where I stopped and continued layering. This is the same method you would use if you were using fabric strips.
Once you get to the point that your dryer ball is about the size of a baseball, you’re ready to finish wrapping.
3. Tuck in the Ends
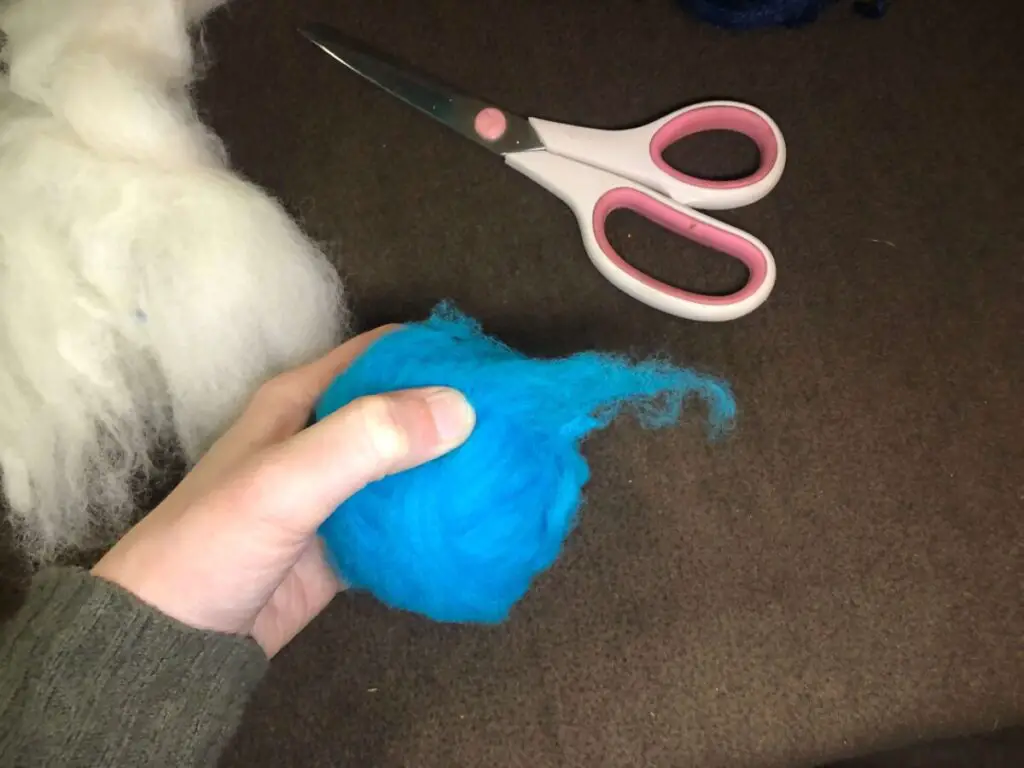
If you’re using wool roving, pull your remaining fiber away from the fiber you used to form your dryer ball.
You want to pull instead of cut because the fluffy end from pulling it apart means that your end will attach easier to the ball. The picture above shows the fluffy little tail of my fiber.
Just smooth the end over the rest of the ball and then immediately stuff it in the pantyhose which we’ll talk about next.
The same goes for yarn. If you pull your yarn apart it’ll have a fluffy little tail that will blend in with the rest. Then, just tuck your fluffy little yarn tail under the other lines of yarn and move on to step three.
If you’re using wool strips, just finish with the strip you’re winding, tuck the last tail under a previous strip and you’re done!
You want to make sure not to make a knot or your wool ball will have a weird bump on it.
Now that you’ve got your cute little wool balls, time to stuff them into the pantyhose.
3. Stuff in Pantyhose
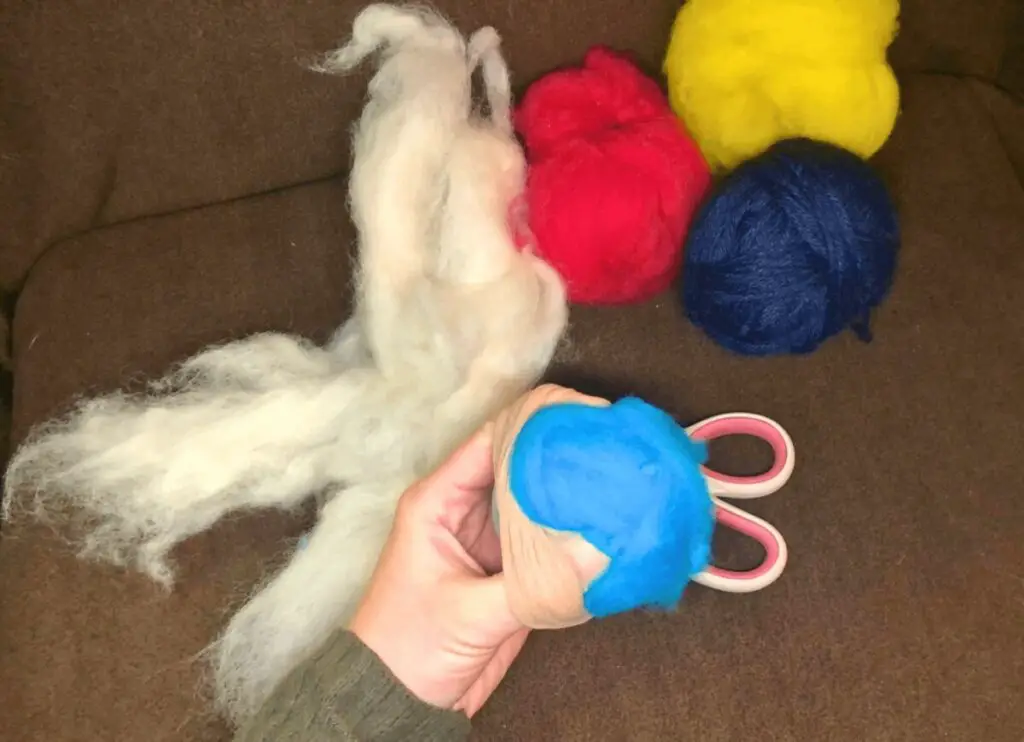
Look at you! Already made your little dryer balls, the only thing that’s left is to get them ready for the wash cycle.
This is pretty simple, just stuff your balls into a pair of pantyhose or a pair of thin socks.
I found that the easiest way is to get all the way to the bottom, put the ball in, and then pull the pantyhose around the ball.
It’s important to make sure you get the dryer ball all the way to the bottom of the pantyhose. The dryer ball will felt in the shape of what it’s stuffed in, so if it’s got some extra space, the dryer ball will go into that space.
The great thing about the pantyhose is you can usually put four dryer balls into each leg. I somehow managed to fit five.
To space out your dryer balls, you can either tie a knot in the pantyhose between each ball or tie a piece of string between each one.
You have to make sure to space them out or else all your dryer balls will stick to one another and you’ll be left with one big, awkwardly shaped dryer ball.
Here’s what a completed string of dryer balls looks like.
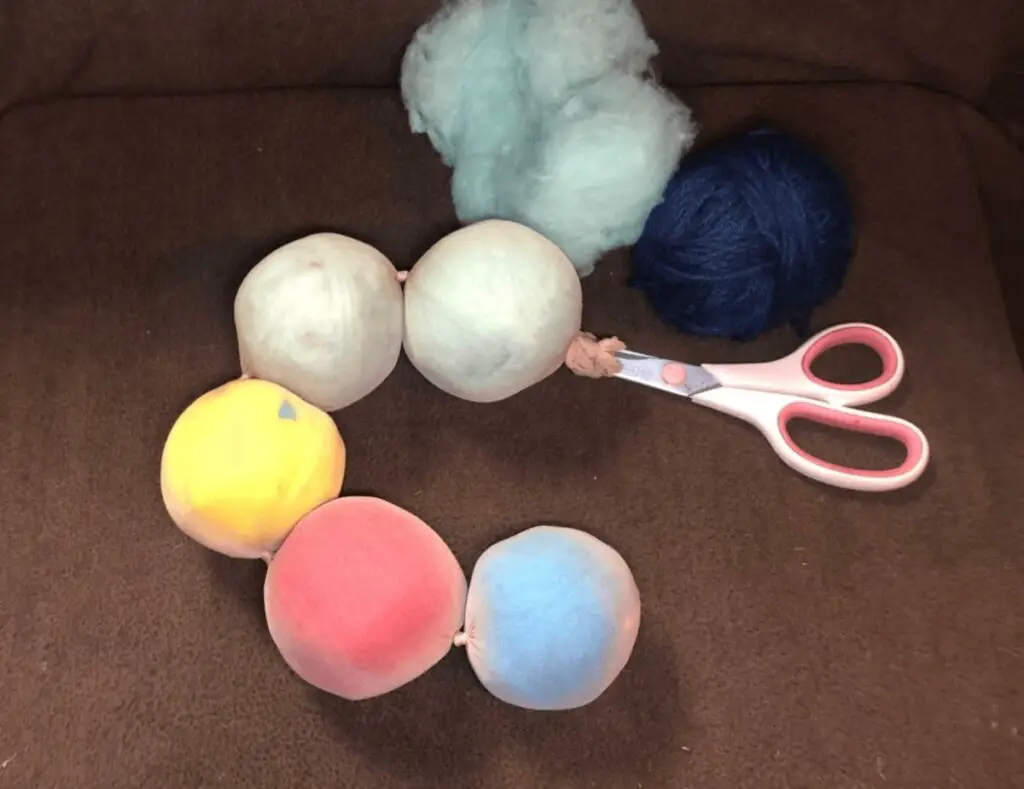
The benefit of using string instead of a knot is that it makes it so your pantyhose might be reusable. But, make sure you use cotton string, if you use wool yarn, it will felt just like your dryer balls do.
Boom. Easy peasy lemon squeezy. This last part is the easiest part of all.
4. Wash and Dry
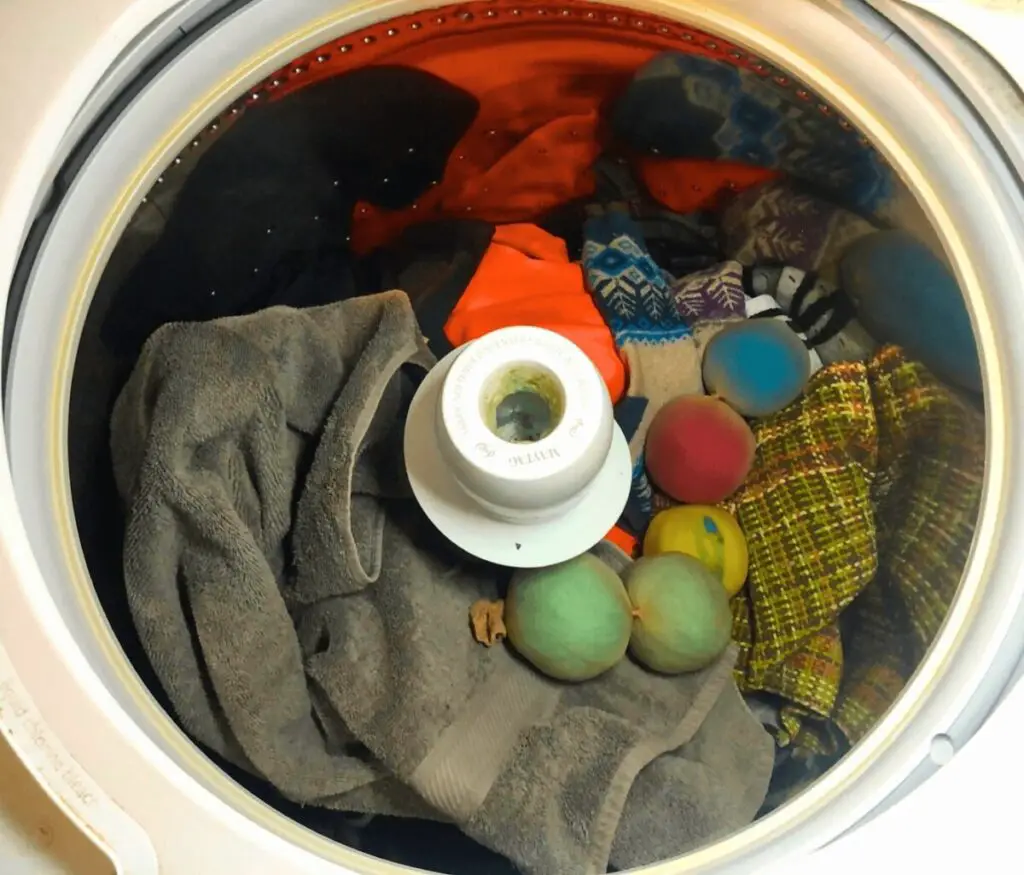
To fully form your dryer balls, you just have to run them through the washing machine and dryer a few times.
When you run them through, you want to make sure you use hot water, the heat is what will cause the felting process.
If you don’t want to waste a wash cycle, you can just throw them in with a full load of laundry, like I did in the above picture.
Then, put them through the dryer again with heat.
Repeat this process at least once more. Your dryer balls should still be slightly squishy but they will have shrunk in size.
5. Finish

To finish your dryer balls, you just have to take them out of the pantyhose or sock.
If you used pantyhose, the easiest thing to do is to cut them out.
As you can see from my picture, the wool sticks to the pantyhose as it felts, you kind of have to rip them apart. This is completely normal and means that your dryer balls have felted properly.
Your dryer balls have formed properly if you take them out, they hold their shape, and they still have a little squish to them.
Tadaa!! You have officially formed your very own wool dryer balls! Not quite as perfect as the commercially made dryer balls, but they’ll still work just as well.
All that’s left is to throw them in with your wet laundry and enjoy all the great benefits they give for 1000s of loads to come.
Wrap Up
Man, you put in some work making those dryer balls.
Seriously, give yourself a pat on the back!
Now, you’ve not only created dryer balls out of nothing more than some wool, you also created a cost-saving, eco-friendly, laundry helper.
Even though you’ve created something awesome, it was pretty simple. Let’s recap what you had to do.
You formed the dryer balls by making a tight wool center and then continuing to wrap the wool around the middle until you have a ball about the size of a baseball.
Then, you stuffed them in a sock or a pantyhose and tie a knot between each ball to keep them from attaching to one another.
Last but not least, send them through a wash and dryer cycle at least twice with high heat.
All that’s left is to free them from their pantyhose prison and throw them into the dryer with all your loads of laundry.
Woo! Now that you’ve got wool dryer balls mastered you can make some for all your friends. Now, go make some more awesome things!