One of the most fun realizations to have as a fiber artist is to realize that you can make your colorways and dye your own yarn. How cool is that?? So, here’s how to dye wool.
For acid dyes, soak your wool in a bath of water and acid. Then add it to a hot dye pot that contains your desired colors. For natural dyes, soak your dye materials overnight and heat the bath. Then add your wool to the pot and allow it to heat to get the color into the wool.
Those few steps are not nearly enough information to get started in your dyeing journey. This post talks about everything you need to know and gives a step-by-step guide on how to dye wool with both acid dyes and natural dyes.
We’ve got a lot to cover so let’s get rocking!
Disclaimer: This post contains affiliate links. This means I may earn a commission should you choose to make a purchase using my link
Table of Contents
How to Dye Wool With Acid Dyes
There are a ton of different types of dyes, and each method gives a different effect to the yarn. Acid dyes, natural dyes, even food coloring, and kool aid can be used.
Acid dyes are made specifically to dye animal fibers and not all natural fibers are created equally. If you want to dye cotton or other plant fibers, you’ll have to use a different kind of dye.
For this tutorial, I’m going to dye yarn and wool a solid color using a dye pot on a stove.
If you want some helpful tips or to learn more about acid dyeing wool, ChemKnits Tutorials on YouTube has great videos about all things dyeing.
For all my book lovers out there, I have two acid-dye books that I use quite a lot. I recommend Dyeing to Spin and Knit by Felicia Lo (see on Amazon) and Hand Dyeing Yarn and Fleece by Gail Callahan (see on Amazon).
Let’s get into the action!
Materials Needed

Regardless of what dye method you’re choosing to use, these are the materials you’ll need to dye wool.
- Acid Dye
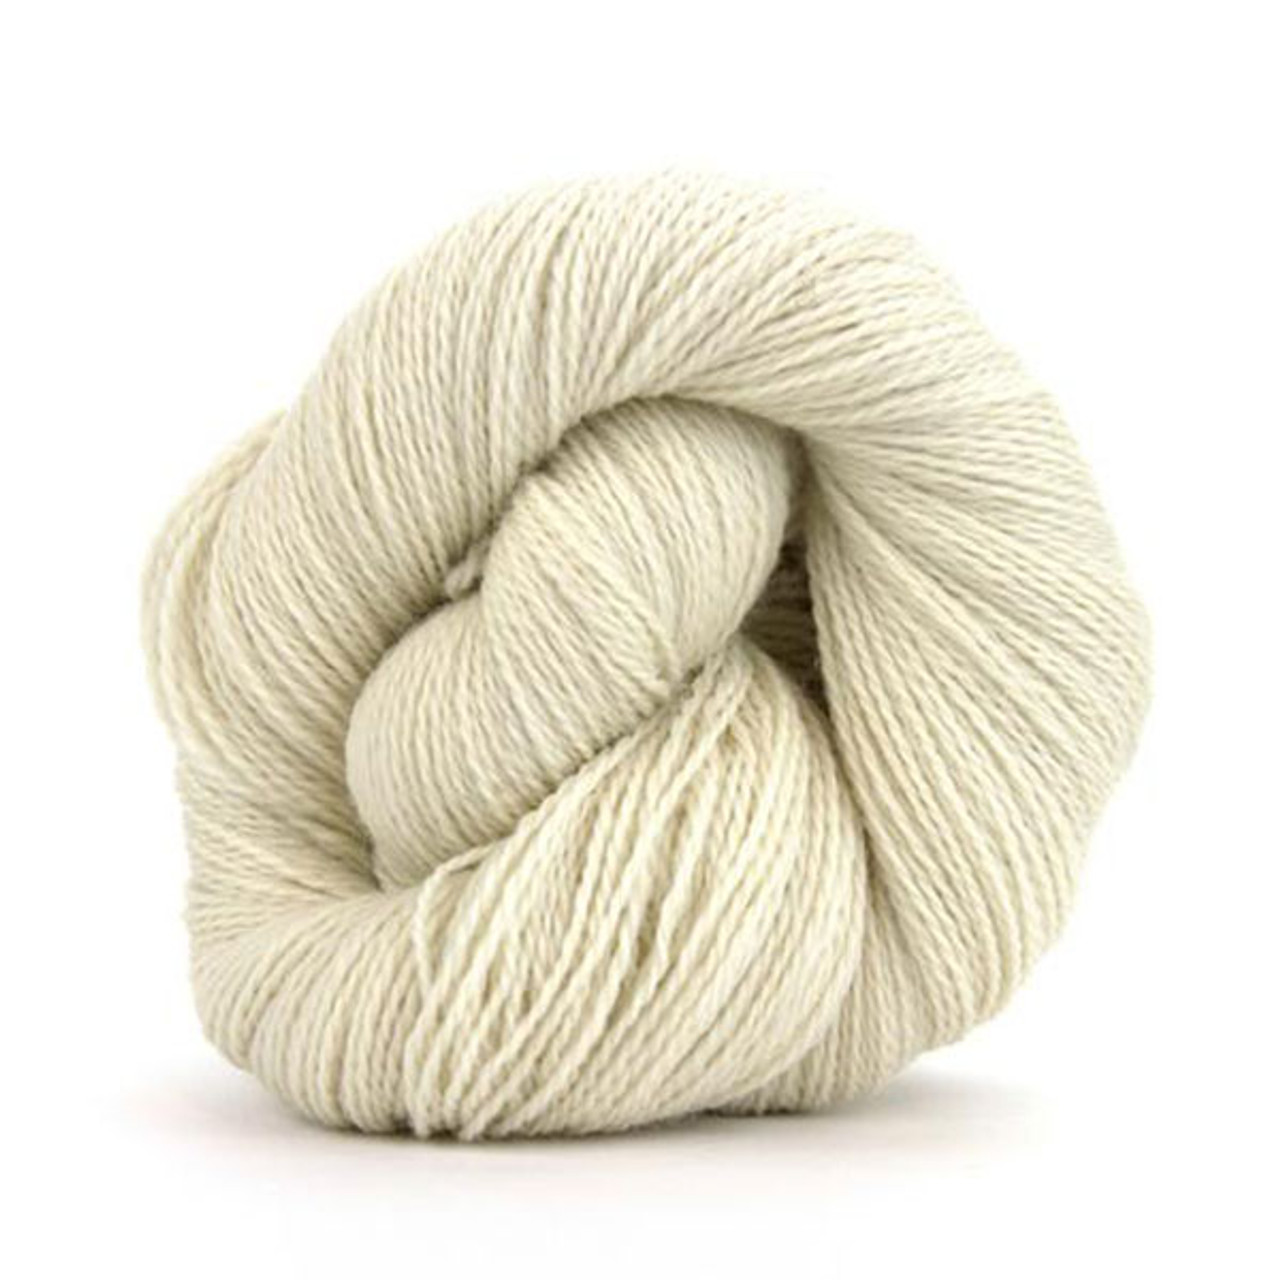
- White wool or wool yarn (If you’re using raw wool make sure it’s been washed and the oils removed)
- Acid (citric acid or white vinegar)
- Stainless steel pot (must be dedicated to dyeing and not used for cooking)
- Tongs (must be dedicated to dyeing and not used for cooking)
- Gloves
- Dust mask (optional but recommended)
There are a lot of options out there when it comes to dyeing supplies, so, here are a few options from Amazon and The Woolery to help you get started. (These are affiliate links so I’ll get a commission if you make a purchase using my links).
Jacquard Acid Dye Starter Set

$28 (See on Amazon). Contains yellow, red, blue, and black dyes, a color reference card, and citric acid.
PRO WashFast Acid Dyes

$1.99-$12.60 (See on the Woolery) One-ounce containers of acid dye, come in 48 different colors.
Fine Merino Top

$17.99 (See on the Woolery) 250g of 100% Merino Top, perfect for dyeing your own spinning colorway.
Organic Merino Fingering Weight Yarn – Skein
$13.99 (See on the Woolery) One undyed 100g Merino wool skein of fingering weight yarn.
Citric Acid

$9.99 (See on the Woolery) Eight ounces of citric acid for dyeing protein fibers.
Once you have all the materials you need, it’s time to get ready for the real fun.
1. Prep Wool
To prepare your wool or yarn for dyeing, you’re going to mix a water and acid bath and let it soak for a while.
Before you soak your wool, you want to make sure to get the dry weight of the amount of fiber you will be dyeing.
You can weigh your fiber using a food scale or, if you bought a specific amount of fiber or yarn, you can use the weight on the label. Write down the weight or save the label, you’ll need this for one of the next steps.
Fill a sink or tub with hot water and add your acid. If you’re using white vinegar, add just a splash, if you’re using citric acid, add a pinch.
Now, add your wool and let it soak until it is fully saturated. I soak mine for at least thirty minutes but it can be soaked until you’re ready to dye.
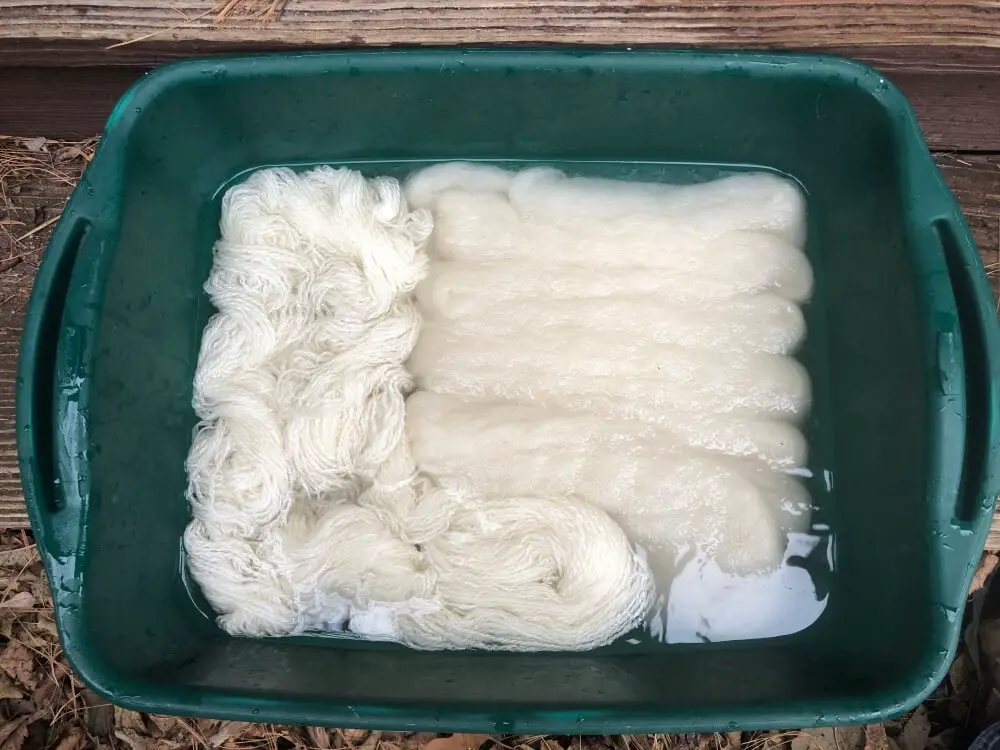
For this step, the amount of acid you add is not super important, this is just a presoak that will help the dye ‘strike’ the wool. Striking is the term used in dyeing for when the dye bonds to the wool.
You can dye successfully without presoaking your wool in acid, but it helps quicken the process. If you don’t want to presoak your wool with acid, you still need to soak it in warm water until it is full saturated.
2. Prep Dye Area
Now that your wool is soaking, it’s time to get your dye area prepped. There are a few important things you need to keep in mind while doing this.
Acid dyes are almost always in powdered form, the fine powder gets everywhere and on everything.
You don’t want to eat or breathe in the fine particles of the acid dye powder. So, you should wear a dust mask, wear gloves, and only use pots and utensils that are dedicated to dyeing.
This is a great time to give that pot or spoon that you hardly ever use a new life as a dye instrument.
Once you have all dye dedicated utensils and your safety equipment, it’s time to set up the dye area.
If you’re going to dye inside, you’ll want to cover your table or whatever you’re using with a plastic tablecloth or plastic wrap. You can get them pretty cheap from a dollar store.
In the best-case scenario, you wouldn’t use your kitchen stove to dye in, but that’s not feasible for everyone so you can use your kitchen stove you should just be careful to not get the powder on it.
To keep your kitchen stove clean, you should do all your dye mixing and wool prep somewhere else. If it’s possible, mixing dye stuff outside is a great way to eliminate the risk of getting the powder in your kitchen.
No matter how you accomplish it, you want to make sure you don’t get acid-dye powder on anything that you’re going to be eating or cooking with.
3. Make Dye Bath
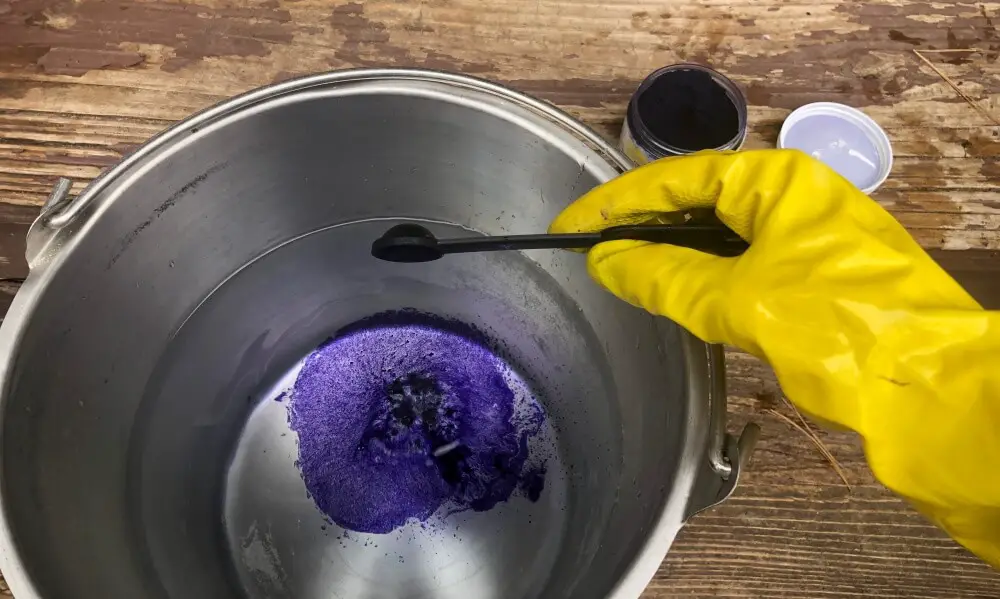
Alright, you’ve got your wool soaking and your dye area is prepped. It’s time to mix your dye and create a dye bath.
Choose what color you’d like to start with, if this is your first time dyeing wool, I recommend just using a single color until you learn the process and then experiment with mixing colors later.
A dye bath is the pot that you will dye your wool in, it’s a mix of water, acid, and dye.
To mix your dye bath, you will want to fill your pot up about 2/3 full of water or as full as you need to so your wool floats and isn’t cramped or touching the bottom.
Next, add your acid. For every 100 grams of wool or yarn, you’ll add one tablespoon of white vinegar or 1/2 teaspoon of citric acid.
This is why you need to know the dry weight of the wool you’ll be dyeing.
Now for the dye, for every 100 grams of wool or yarn, you’ll add 2/3 of a teaspoon of your powdered dye. If you want a lighter more pastel color, add less dye powder.
If you add too much dye powder to your dye bath, you’ll have dye left over in the pot when you’ve finished dyeing. This isn’t the end of the world but we don’t want to waste any dye.
These are just general rules of thumb and the amount of dye will vary based on how saturated you want the color to be and the type of dye you use.
To get more information about your specific dye, the dye company’s website should have information specific to their dyes. Here is the pdf made by Jacquard for their acid dyes.
4. Dye the Wool
Now, finally, the time has come, it’s time to dye your wool!
Take your dye bath pot and put it on the stove, if you have a separate hot plate you can use, that’s the best-case scenario.
But if you’re using your kitchen stove just make sure to clean the surface well after you’re done dyeing.
Heat your dye pot until it’s just below a boil. You don’t want to water to boil once you add the wool because the agitation caused by the bubbles can felt the wool.
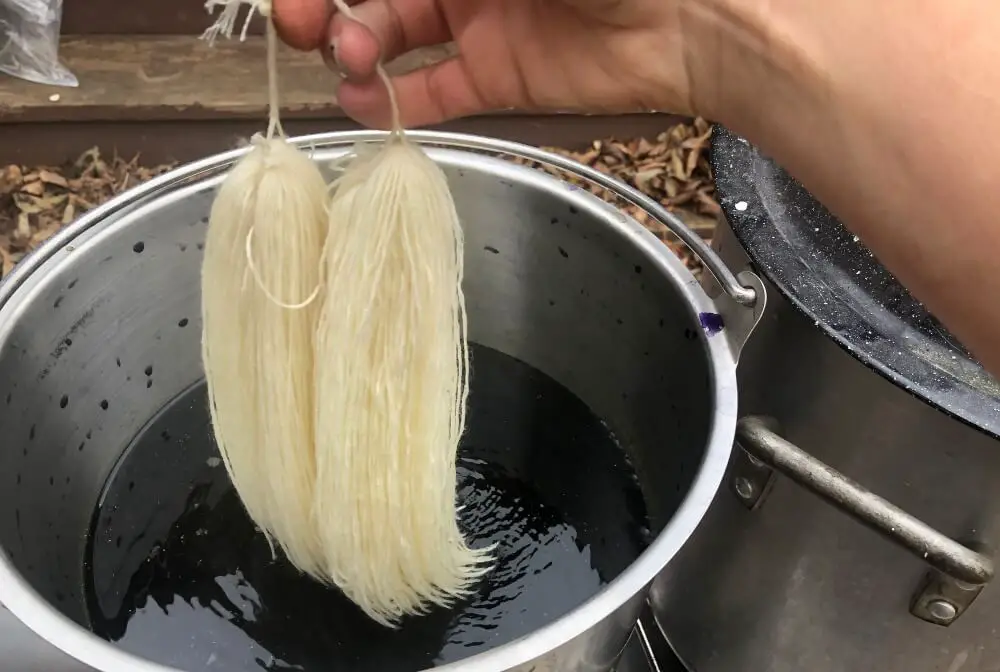
Once your pot is heated, it’s time to add your wool or undyed yarn. Take your wool out of the presoak and squeeze the excess water out.
Slowly add the wool to the dye bath, being careful not to splash the dye. Press the wool down until it is fully submerged in the dye bath.
Keep the dye pot on the stove for about 30 minutes. You don’t want to heat the wool for more than an hour or you’ll risk scorching the wool.
Once you’re done heating the wool, remove it from the dye bath using a pair of dye-specific tongs. Let the water from the dye pot drain off the wool back into the pot.
Put your wool into an empty sink or the tub you used to presoak it.
Take a look at your empty dye pot, your water should look mostly clear, if there’s still a significant amount of dye in the water, you can dye another skein of yarn or wool to get a lighter color.
Now that you’ve got your wool dyed, it’s time to do the finishing touches.
5. Finish Wool
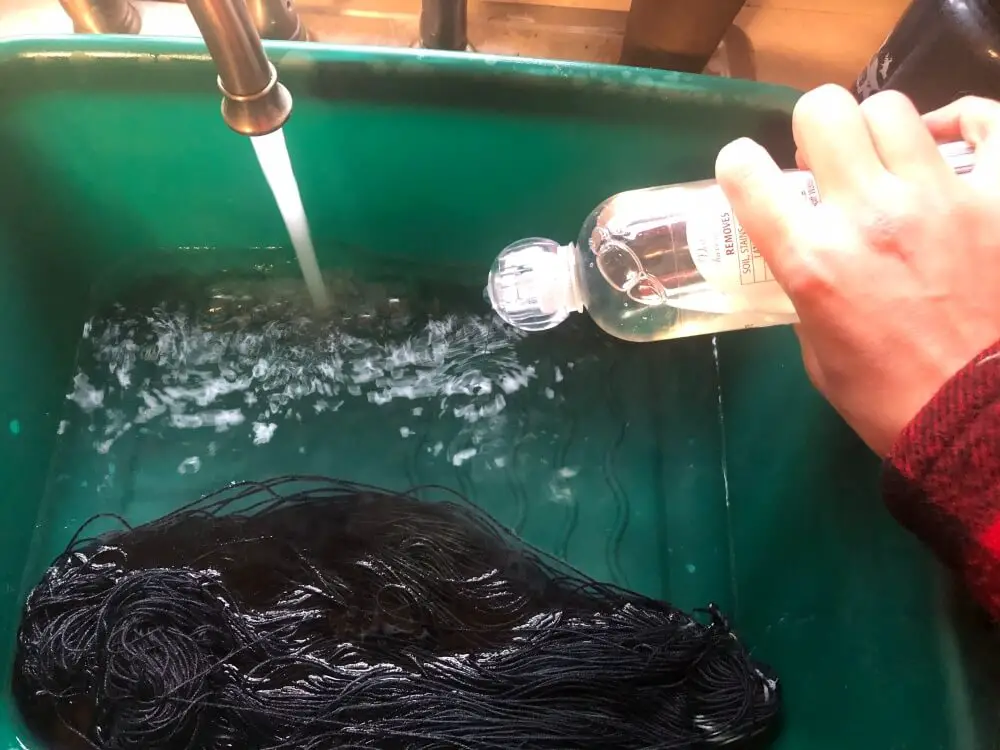
The last thing you need to do is wash your wool to get any excess dye out of it.
Fill a sink or tub with warm water and add some wool wash or dawn dish soap. Gently add your wool to the tub and press it down so it is fully immersed.
Let the wool soak for about ten minutes.
Remove the wool and replace the soapy water with clean water. Add the wool, submerge it, and let is soak.
If your water is completely clear, then you’re done, if not, you’ll want to continue washing and rinsing your wool until the water is clear.
Once your wool is fully rinsed, gently squeeze out the water, don’t wring it or agitate it or you will felt the wool.
Now, simply hang it up to dry on a drying rack or hanger.
You’re done! You just created some gorgeous yarns. You deserve to put your feet up and admire your handy work.
Now that you know how it’s done, you can experiment with more color combinations and go dye crazy! Just make sure you follow safe dyeing practices.
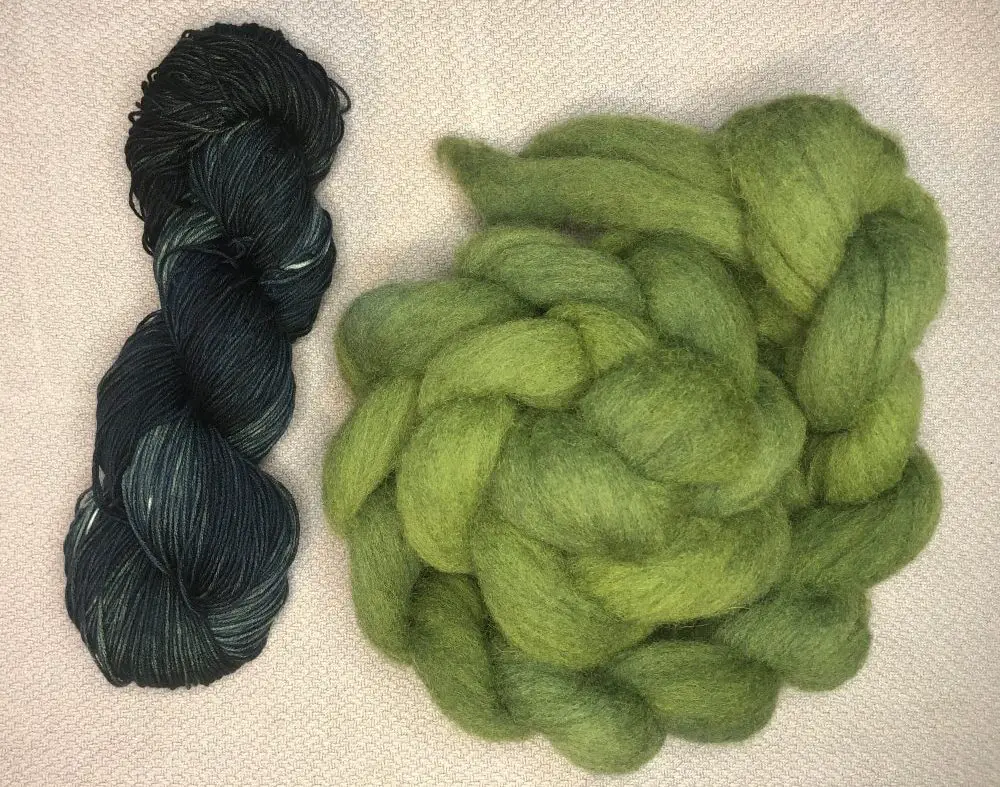
Here is my finished yarn and fiber.
How to Dye Wool With Natural Dyes
Natural dyeing is a fun way to dye because you can go out and find something in the woods and then create beautiful colors with it. It’s a little more labor-intensive than acid dyes, but it’s just as fun.
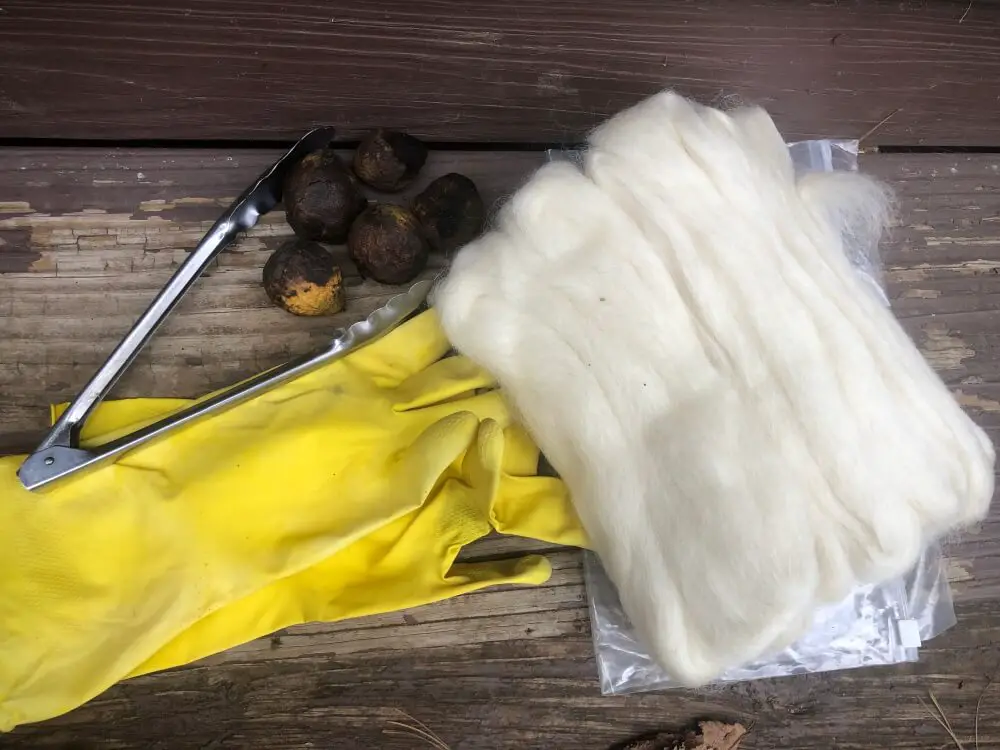
For this tutorial, I’m going to be dyeing this wool with Black Walnut husks in a big dye pot.
I’m lucky enough to have access to a black walnut tree but you can use the same method with materials you can find at the grocery store like onion skins, coffee, red cabbage, avocado pits, and turmeric.
There are a ton of other natural ingredients that you can use as dyestuff, you just have to go discover them.
Natural dyes don’t require the use of an acid to set the dye, instead, they use a mordant which sets the dye and helps bring out different colors depending on the dye/mordant combination you use.
Some dye materials won’t need a mordant added because they have the chemical naturally occurring in the material. This is the case with black walnuts so I won’t be using a mordant in this tutorial.
You can also dye wool without the use of a mordant but the dye will fade much more quickly without using a mordant.
For a book on natural dyes, I recommend the book Natural Dyeing with Plants by Franiziska Ebner and Romana Hasenohrl (see on Amazon).
I used this book a lot when I was first learning about natural dyes and I still referenced it for this project.
Now let’s skip to the good part.
Materials Needed
Here’s the list of materials you will need to dye your wool or yarn with natural dyes.
- Natural dye 1-1 weight ratio to wool (100g skein of yarn needs 100g of dyestuff)
- White wool or wool yarn (If you’re using raw wool make sure it’s been washed and the oils removed)
- Mordant (I won’t need a mordant since black walnut shells contain tannic acid which is a mordant)
- Stainless steel pot (must be dedicated to dyeing and not used for cooking)
- Tongs (must be dedicated to dyeing and not used for cooking)
- Gloves
- Dust Mask (if using powdered materials)
The general rule of thumb for natural dyes is you’ll want to gather at least enough to have a 1-1 ratio between the wool and dyestuff. That means 100 grams of wool needs at least 100 grams of dyestuff to get a good color.
However, this will vary depending on the specific dye material you are using. There are a ton of recipes out there for natural dyes so if you’re not sure how much you need, do a quick Google search or look up a dye recipe in a book to double-check.
If you’re using powdered natural dye stuff from a dye company, the ratio might vary. You can check on their website or sometimes even on the dye packaging to see what their recommended ratio is.
Now, if you’re not sure where to get all the stuff to start this undertaking or it’s winter and there aren’t options to forage for, here are some options to get you started.
Natural Dye Starter Kit

$55.99 (See on the Woolery) Contains 5 powdered natural dyes, 5 different mordants, PH strips, and an instruction booklet.
Organic Merino Fingering Weight Yarn – Skein
$13.99 (See on the Woolery) One undyed 100g Merino wool skein of fingering weight yarn.
Fine Merino Top
$17.99 (See on the Woolery) 250g of 100% Merino Top, perfect for dyeing your own spinning colorway.
Once you’ve gotten everything you need it’s time to get everything prepped.
1. Create Dye Stock
To create your dye stock, you need to soak your materials in water.
Gather your dye material into a pot or bucket and fill it until the materials are completely covered with water. You basically want to treat it like you’re making a really strong cup of tea.
For powdered materials, you can use a smaller container like a mason jar to brew your mix. But, for natural materials, you’ll need a bucket or pot depending on how much you have.
Here’s my big bucket of walnut husks. I probably have way too much!
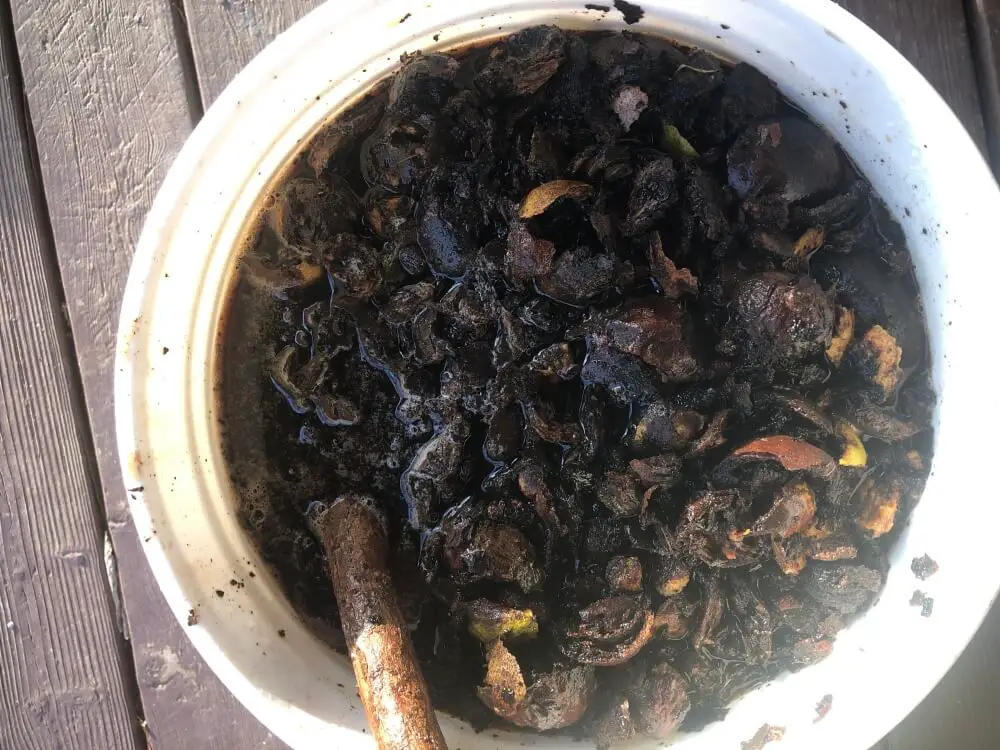
Powdered materials will only need to soak for about an hour, but for raw materials, you’ll want to soak them overnight or even longer depending on how readily they release the dye.
Since my walnut husks are already starting to break down (it’s almost winter when I wrote this), my dye bath turned dark brown within five minutes of adding water to it.
If I were to use fresh green walnut husks, they would need to soak much longer to break down and bring out the natural colors.
Some materials will require you to boil and simmer them to fully draw out the color.
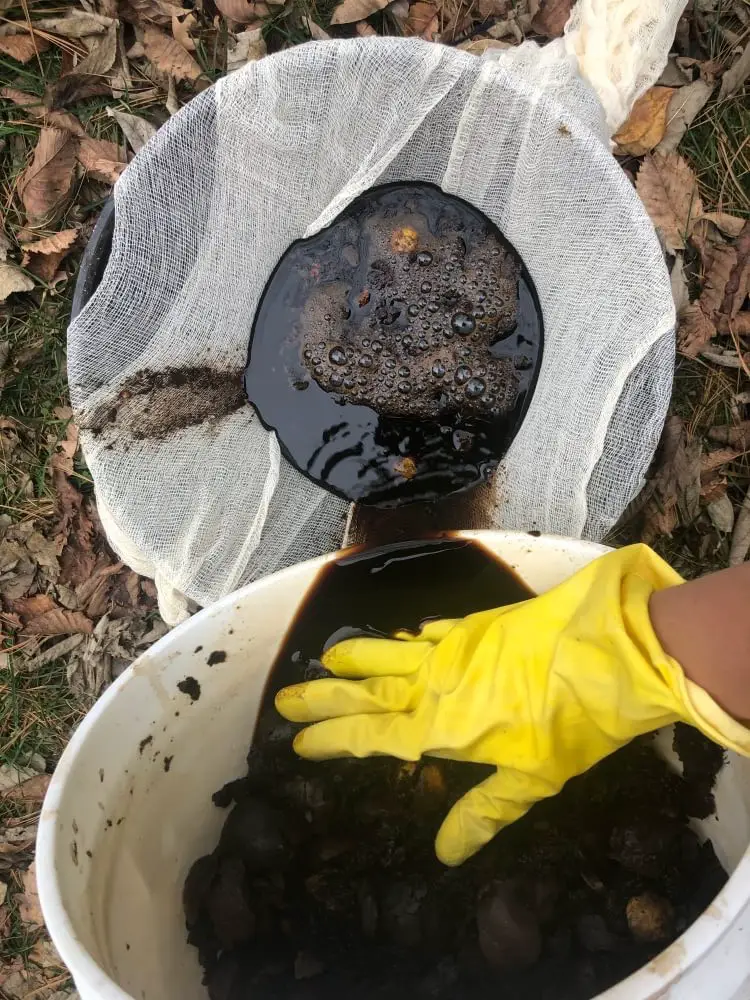
The next day, or once your dye material has been fully steeped, it’s time to strain out the materials. Strain the dye solution into the pot you’ll be dyeing the wool in.
You want to make sure to get as much of the powder or material out of the dye bath or else you’ll be picking it out of the wool or yarn which is no fun.
Now your dye bath is ready to go.
2. Prep Wool
Before you through your wool in with reckless abandon, you need to prep your wool for dyeing.
You need to soak your wool or yarn in lukewarm water until it is fully saturated. If you’re using a mordant, you will add your mordant to this soak to pre-mordant your fiber.
However, since I don’t need a mordant with my chosen dye material, I’m just going to soak my wool in warm water.
While your wool is soaking, you can get your dye area prepared.
3. Prep Dye Area
Don’t let the name of natural dyes fool you. Although the materials used are natural, some of them can still be toxic if eaten or breathed in.
Because of this, you want to make sure you don’t use pots or utensils that you will then use for cooking or preparing food.
A lot of the dye materials are also very strong and potent, so make sure you protect the surfaces you’re doing to be dyeing on with either a plastic table cloth or plastic wrap.
I’ll be doing my dyeing outside so I won’t have to worry about it. Black walnuts are super potent, I wore gloves when I was husking them and it still turned three of my fingers brown.
If you’re using your kitchen stove to dye, make sure you thoroughly clean the surface after you’re done dyeing so none of the dye stuff is left for the next time you cook.
4. Create Dye Bath/Pot
I know what you’re thinking, “hold on I already made my dye bath!” Well, you would be right, and also wrong.
What you made earlier was your dye stock This is a concentrated form of your dye bath.
To create your dye bath, you’ll add your dye stock to a pot and then fill that pot until it’s about 2/3 full.
You want to make sure there’s enough water that the wool doesn’t touch the bottom of the pan and has plenty of space to float freely.
That’s it, super simple but super important so you don’t scorch your wool.
4. Dye Wool
Time for the best part, to dye your wool!
There are two ways to do this: cold dye or hot dye. I had enough dye stock so I decided to try both.
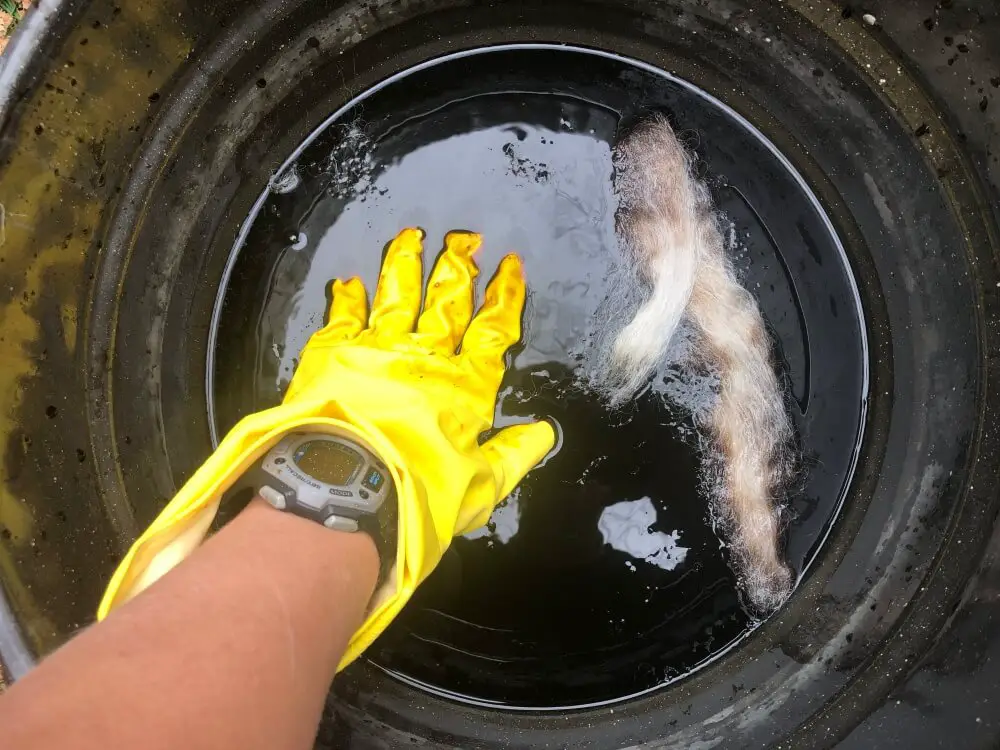
To cold dye your wool, add your fiber to the dye bath and let it soak… and then let it soak some more. Because you’re not using heat, the dyeing process will take much longer than if you used heat.
I left my wool in the pot overnight just to make sure it had plenty of time to soak and give the dye time to bind to the wool fibers.
To hot dye your wool, you’ll bring your dye bath to a simmer, avoid bringing it to a full boil because the bubbles from the boiling could cause enough agitation that your wool could felt.
Add your soaked wool to the dye bath and let it cook for around 30 minutes. You don’t want to cook it for more than an hour or you could risk scorching or burning your wool.
Turn the heat off and let the pot cool until you can safely handle the wool.
Now only washing the wool remains.
5. Finish Wool
Fill a tub or a sink with warm soapy water. Take the wool and gently squeeze out the excess dye. Put the wool in the soapy water and let it soak for about ten minutes.
Drain the soapy water and squeeze the excess water out of the wool being careful not to wring it. Put the wool into a fresh tub of water and let it soak again to rinse the soap out.
While you’re washing your wool it’s important to never agitate the wool or the water as this can felt your wool.
If the rinse water is clear then your wool is good, if it still has color, then continue to gently wash and rinse it until the excess dye is fully rinsed out.
Once everything is fully rinsed all that’s left is to hang your wool or yarn on a drying rack to dry.
You can continue to use the dye pot until the dye is exhausted, this will create lighter and lighter yarn until you run out of color.
Here’s my finished yarn dyed with walnut husks.

And done! Once your fiber or yarn is dry, it’s time to use it to create something awesome!
